2.2.4. Configure analytics labels for network observability
Analytics labels allow you to logically organize endpoints, define monitoring points, and identify protocols within your network for the purpose of understanding your unique network. This not only streamlines the troubleshooting process but also accelerates identifying and resolving potential issues.
The use of analytics labels is a key component of the network observability workflow dashboards. They serve as tags within the dashboards to categorize and filter data. You can also find analytics labels on the Observability home page, marking the starting point for the network observability workflows.
Create labels using the following logical groups:
A service is a user-defined group of endpoints and, optionally, specific ports that have a singular purpose in the network. This grouping can also be used to define subsets of the network that are managed by specific teams or groups, enabling clear ownership and responsibility. For example:
service-environment-role-index: WEB-PROD-SE-002service-role-environment: ACCOUNTING-DB-PRODcluster-service-instance: CLUSTER3-STORAGE-01
A location is a user-defined group of endpoints that identify a physical location within your network topology. Locations can be nested, where one location is entirely contained within another, such as a data center rack, a hospital floor, or a specific building within a campus. For example:
region-datacenter-rackunit: US-WEST-DC1-R02U10geolocation-datacenter-rowrackunit: HKG-DC2-R01RK06U03
A monitoring point is a point in the network where the monitoring stack captures packets, typically a TAP, SPAN port, or remote SPAN such as ERSPAN, VXLAN, or GRE tunnel. Each monitoring point is uniquely identified by a combination of a cStor and a packet brokering port, such as 'Hoboken FW1 External'. Sources for this identifier include VLANs, cVu ports, cStor ports, or GENEVE VNI.
A protocol is the combination of TCP or UDP and a port number used to identify a specific application, also known as a network application. For example, DNS uses port 53, and HTTPS uses port 443.
Configure analytics labels using services
Use the following procedure to configure analytics labels using custom services. If services are undefined, they default to the following IP types: global, private, loopback, local, singletons, multicast, or broadcast. See Default IP types for default service name CIDR blocks.
Go to Configure > Network Monitors > Analytics Labels and select the Services tab.
The initial configuration is input by uploading a CSV file. This file can either be from another cClear device or exported from your IPAM tool. For more information, see Configure analytics labels using CSV files.
The CSV file needs to contain the following information:
Setting
Value
Service Name
Enter a service name.
IP/CIDR
Enter the comma-separated IP address, CIDR block, or IP range for your service. Use IPv4 format and hyphen separate ranges. For example: 20.70.80.0/24, 10.70.80.20-10.70.80.50.
IP addresses cannot overlap. Each subset must be fully contained and fall within the defined IP range.
Port
Optional: Enter the comma-separated port or port range for your service. Port ranges should be hyphen separated. For example: 2598, 1500-1590.
Protocol
Select All, TCP, or UDP from the drop-down menu. TCP is the default value.
Exclude
Select Yes or No from the drop-down menu. No is the default value. When exclude is set to Yes, the IP address, CIDR block, or IP range is omitted from the dashboard metrics.
If you don't have a CSV file, use the following sample or Download a blank analytics label template from your cClear. Edit the values for your environment. Note the spacing necessary for the IP/CIDR formatting:
Service Name,IP / CIDR,Port,Protocol,Exclude
ACME Server,10.197.2.2/24,,ALL,FALSE
ACME Client,10.197.1.2/24,,ALL,FALSE
Exchange,"10.70.80.10, 10.70.80.20-10.70.80.50, 20.70.80.0/24","993, 995",TCP,FALSE
VOIP,30.70.80.0/24,"993, 995",UDP,FALSE
LDAP,40.70.80.20-40.70.90.20,3306,TCP,FALSE
Splunk,"50.70.80.10, 50.70.80.15","1494, 2598",TCP,FALSE
Payment Processing,60.70.80.10,1500-1590,ALL,FALSE
Click Bulk Add Services > Upload Your Completed CSV File to upload the CSV configuration file.

Use the drop-down in each Column Type field to match the label settings to the columns in the uploaded CSV file, and then click Next.

Edit any of the information in the table to adjust your labels. To add an additional label, click Add Row. To remove a label, click delete
 in the Actions column.
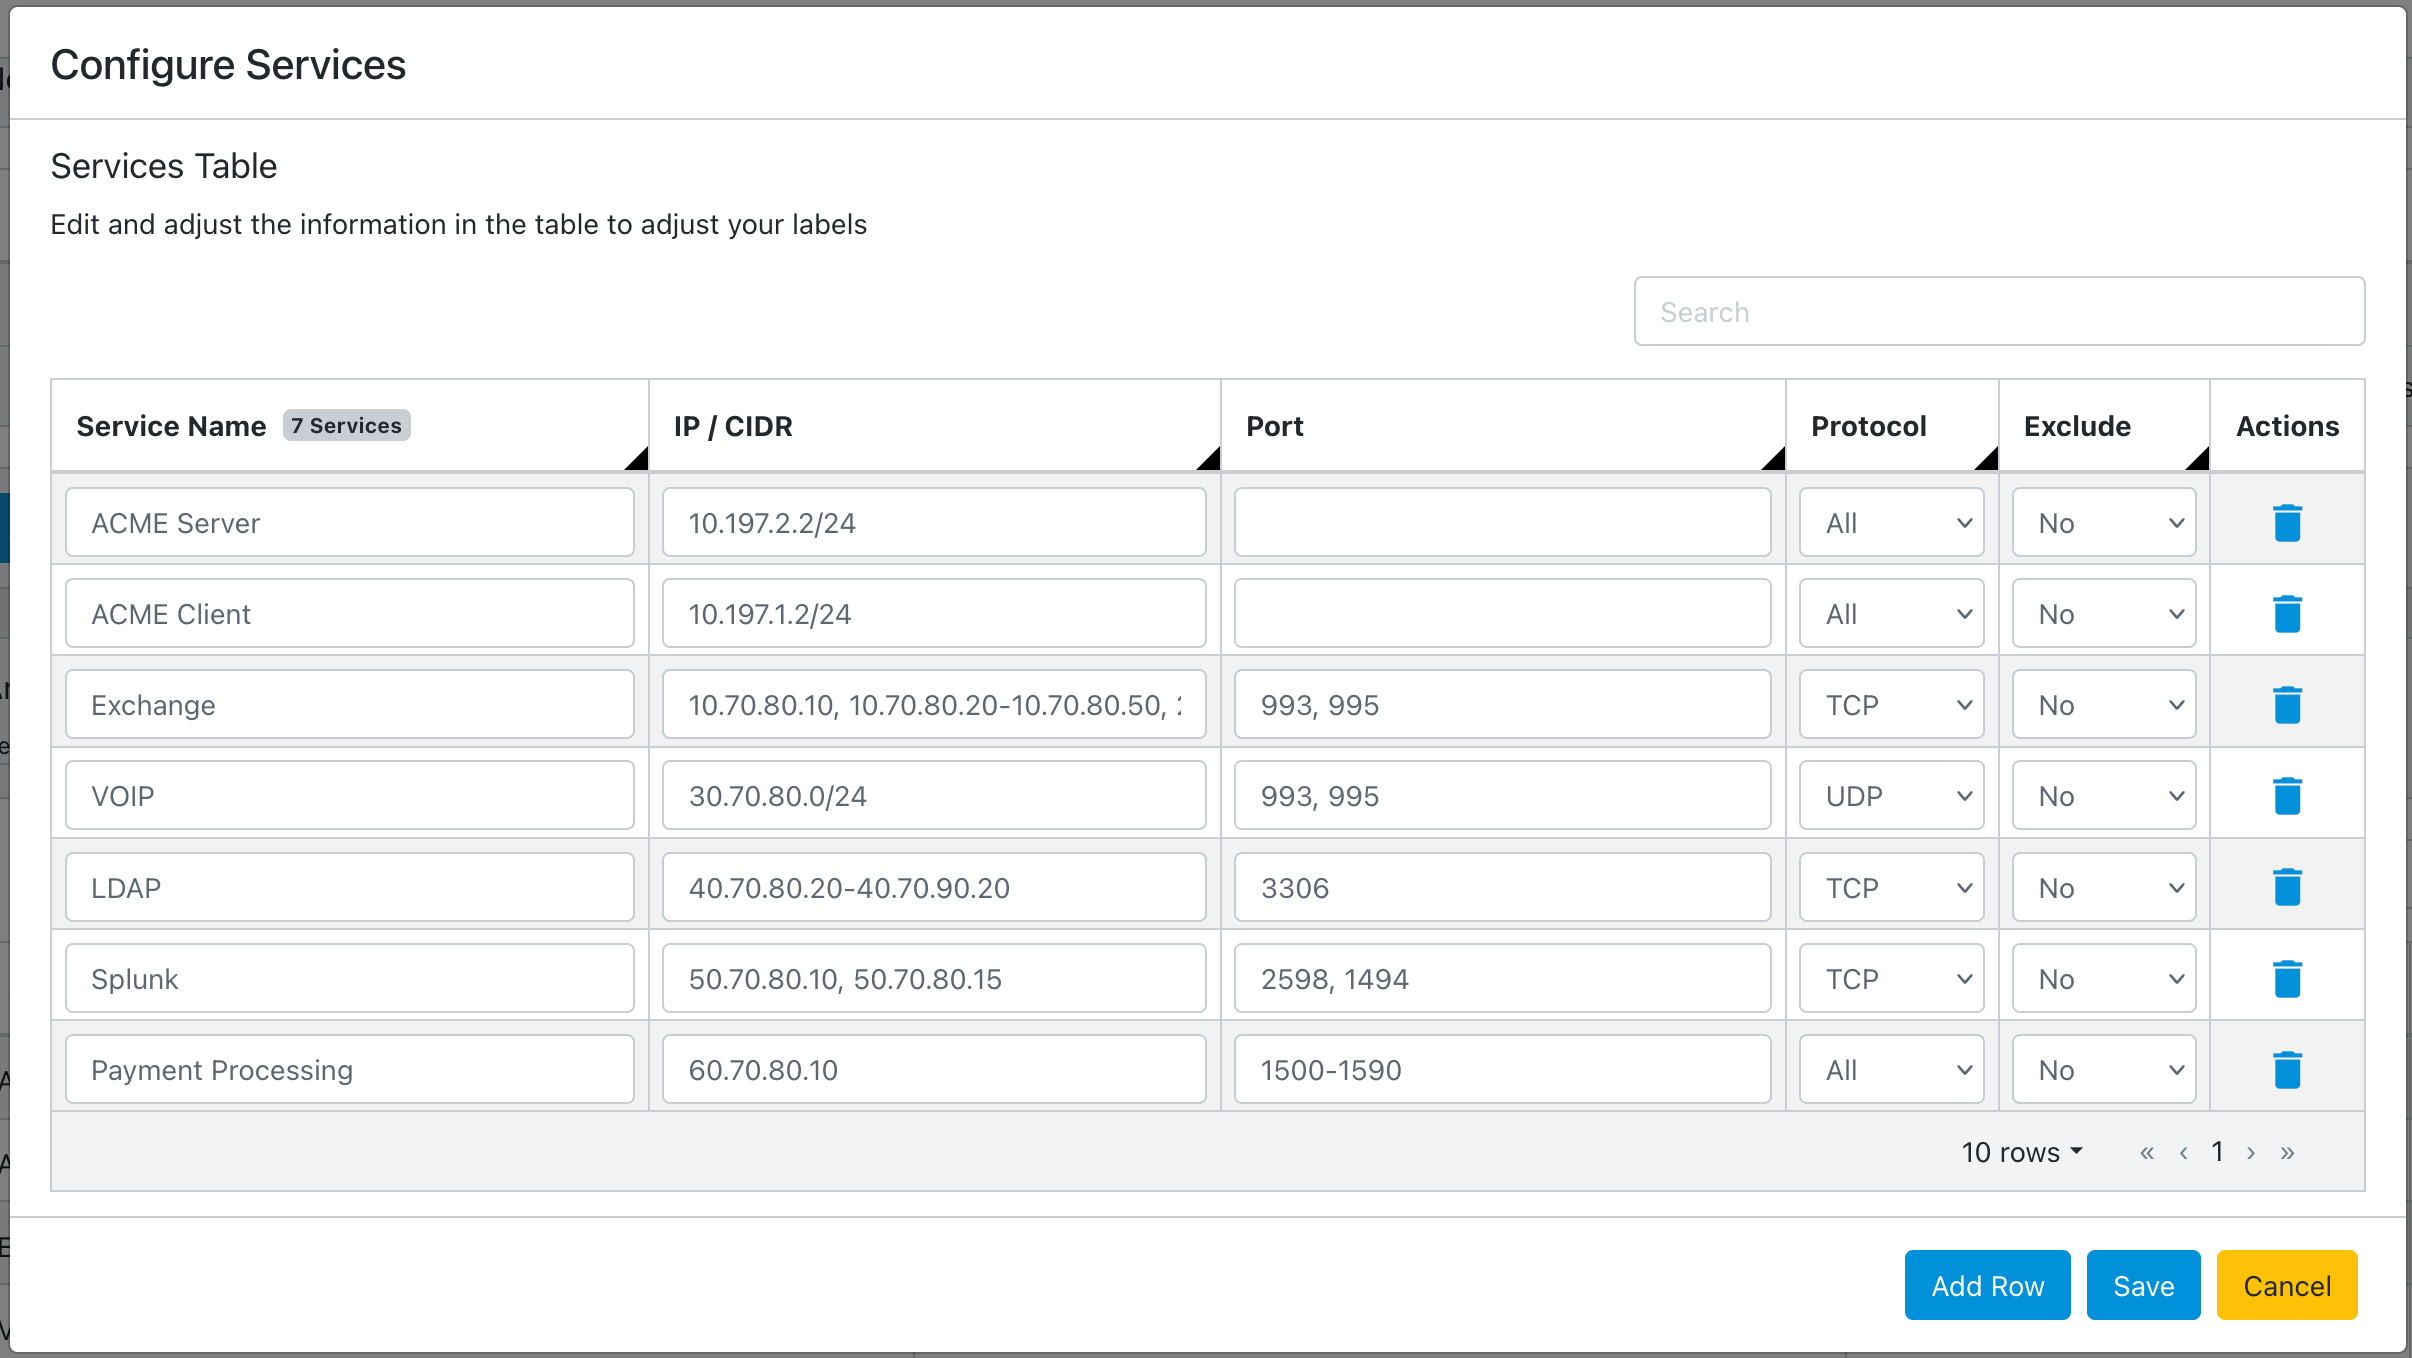
When you finish editing, click Save.
Configured services are displayed.
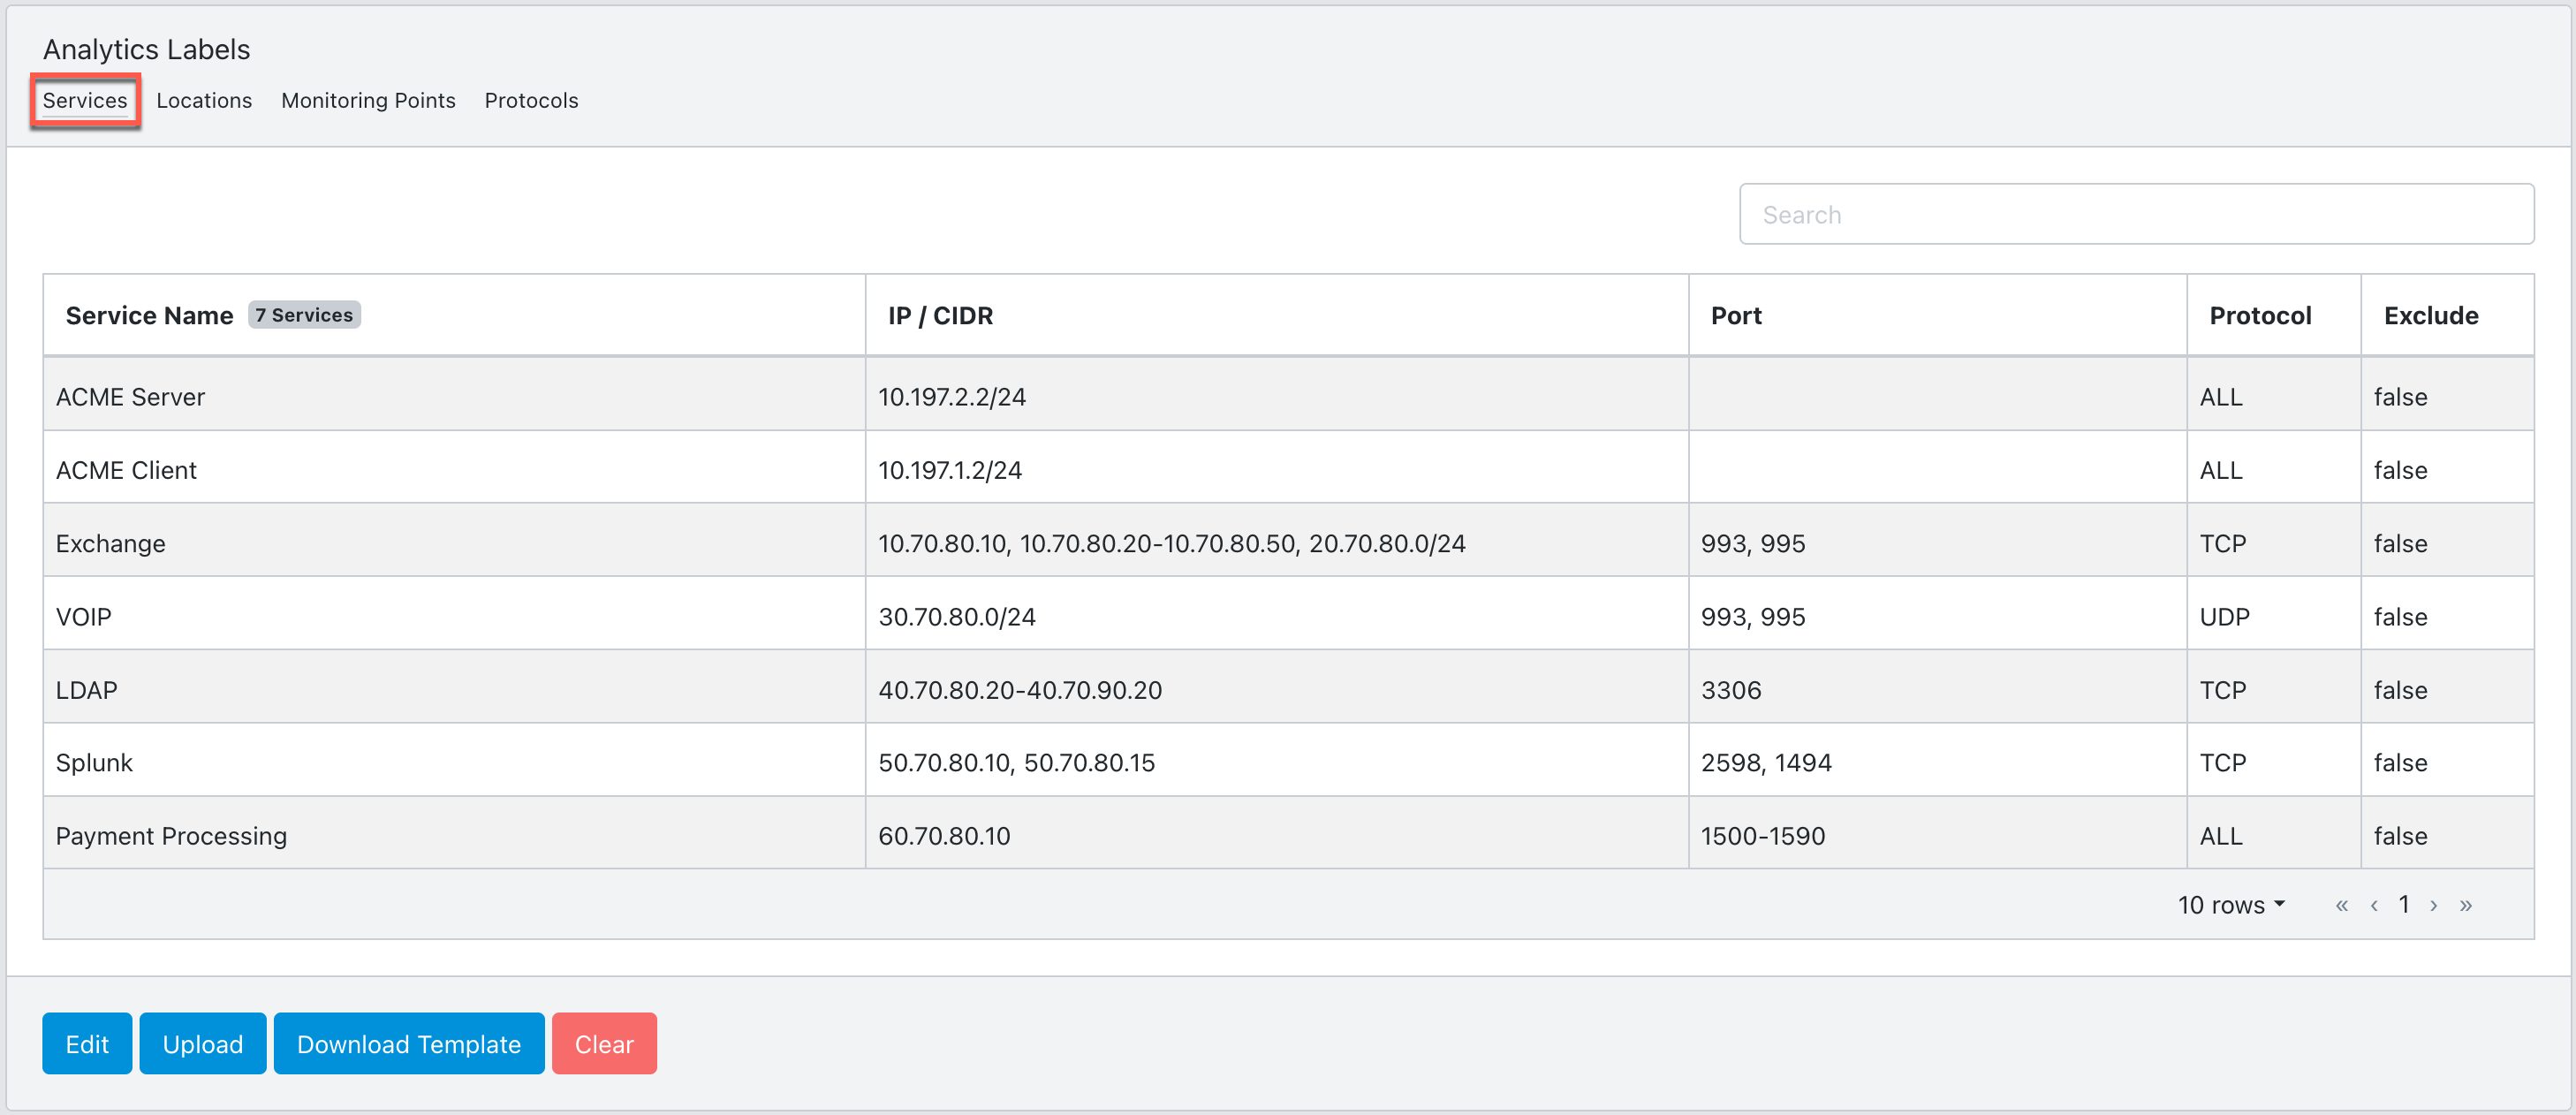
Alternatively, you can enter the label configuration manually using the cClear UI. Click Add Services and enter the values from the table in Step 2. Click Save.
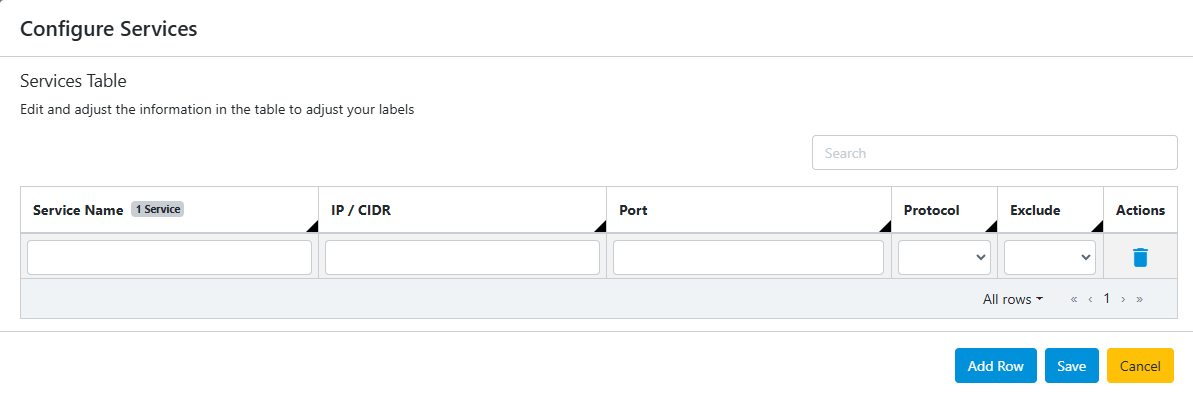
Click Edit to add, modify, or delete individual labels.
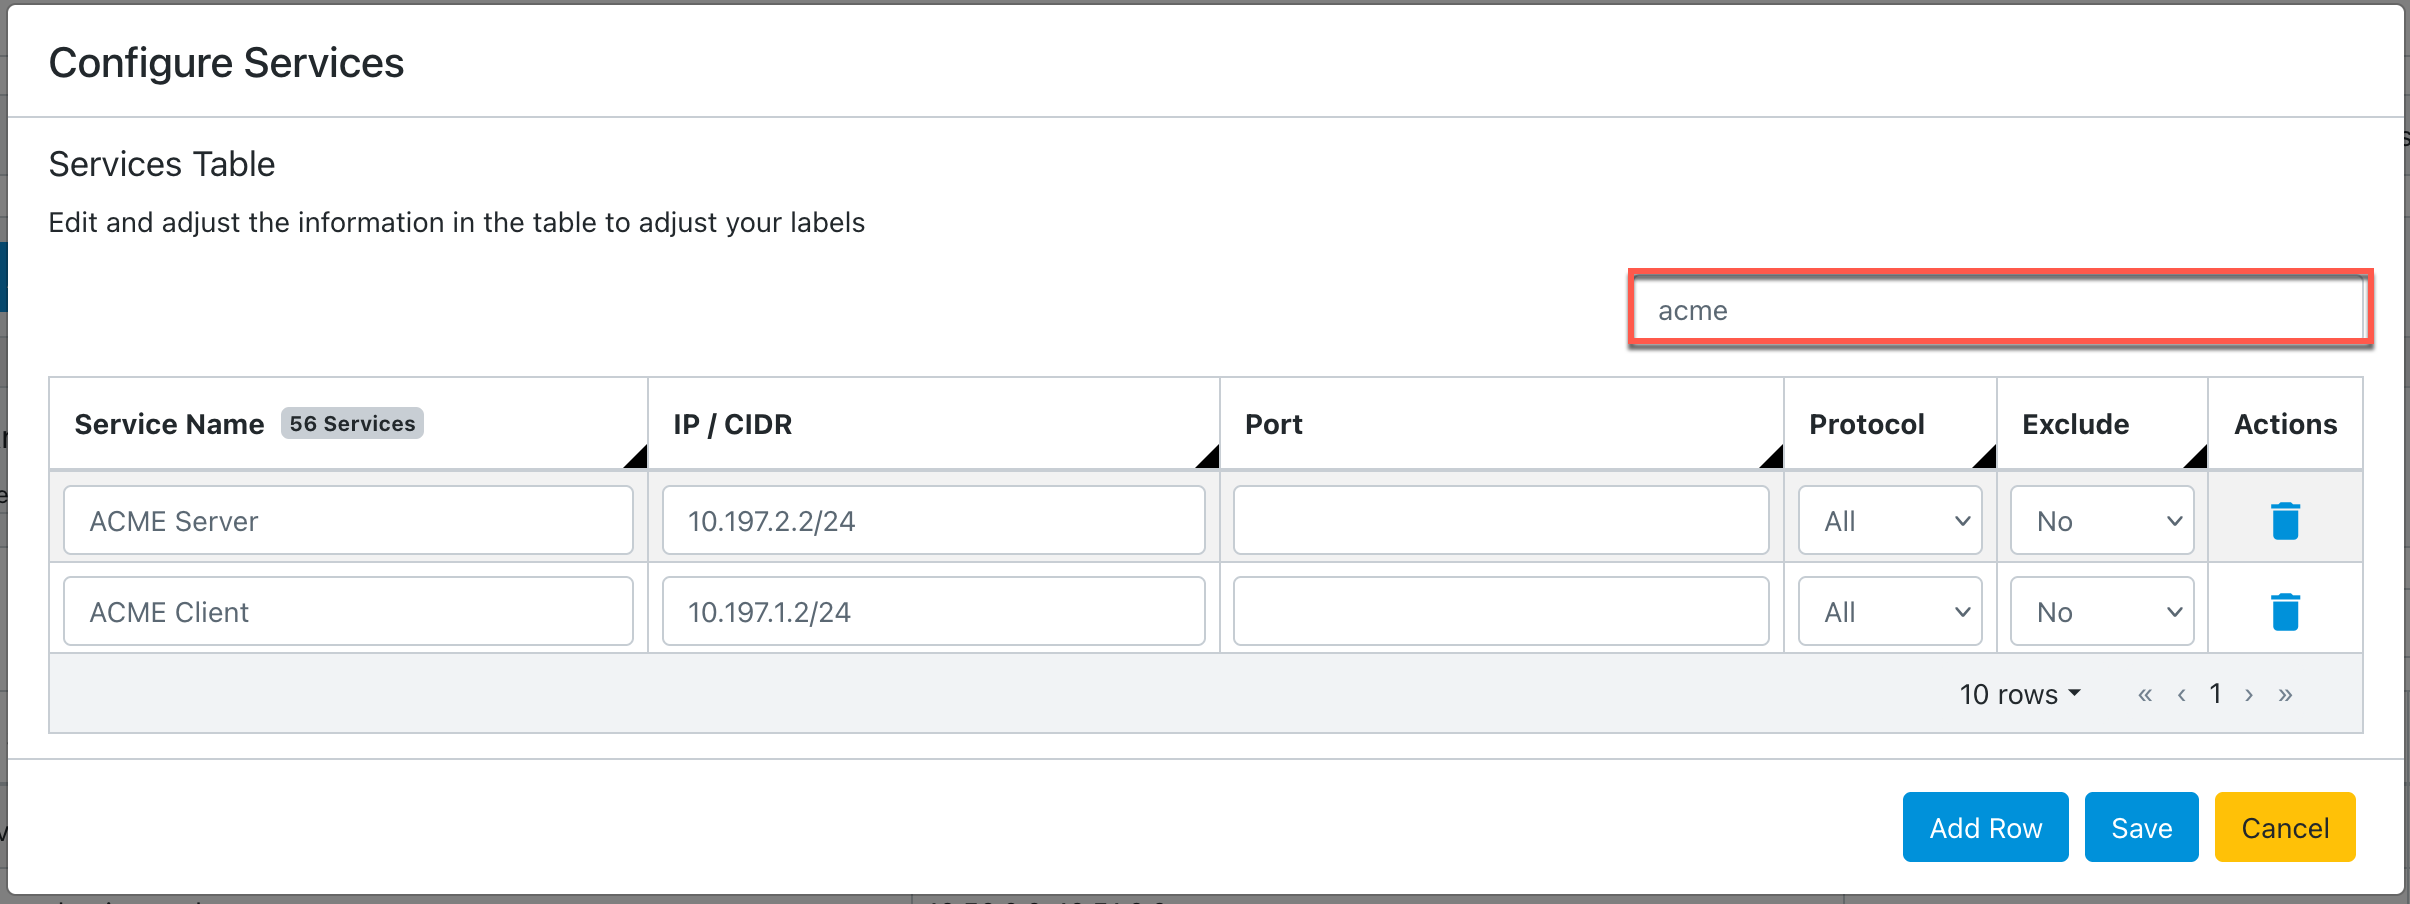
Use the search bar on the Services Table to find the label you are looking for quickly.
Configure analytics labels using locations
Use the following procedure to configure analytics labels using custom locations. If locations are undefined, they default to the following IP types: global, private, loopback, local, singletons, multicast, or broadcast. See Default IP types for default location name CIDR blocks.
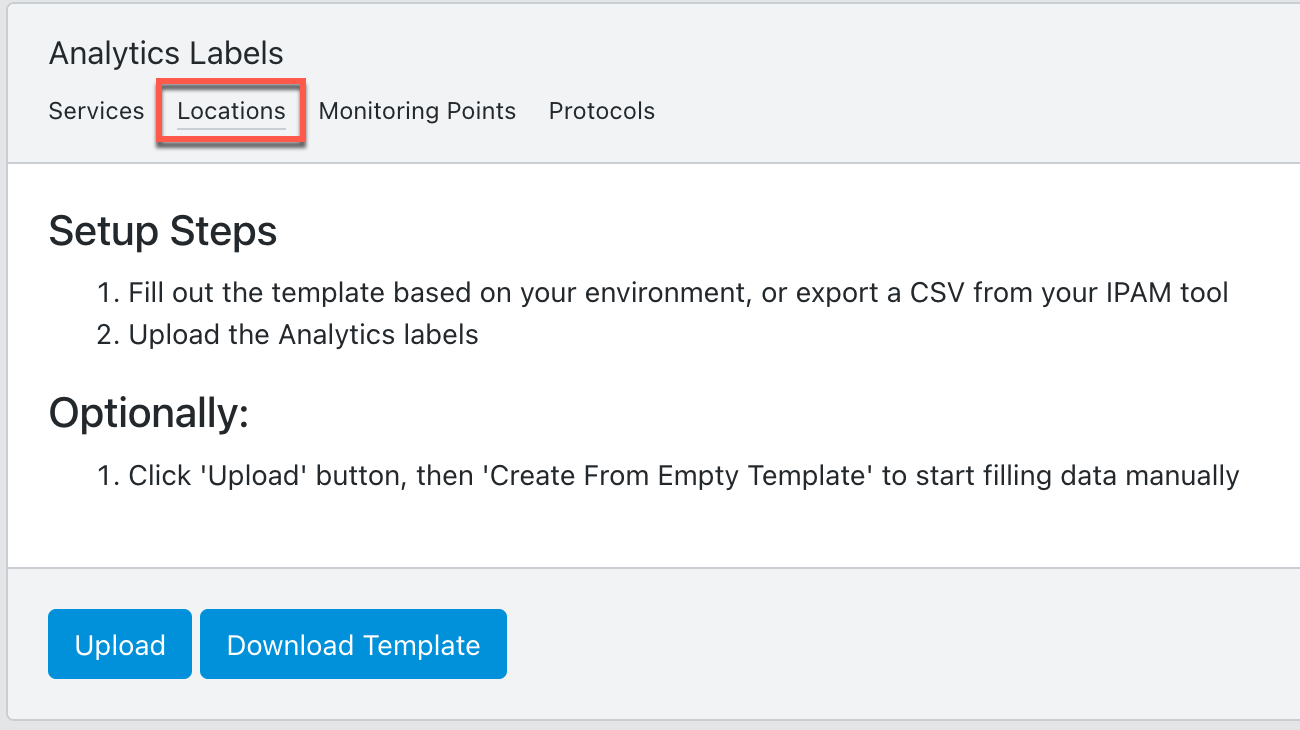
Go to Configure > Network Monitors > Analytics Labels and select the Locations tab.
The initial configuration is input by uploading a CSV file. This file can either be from another cClear device or exported from your IPAM tool. For more information, see Configure analytics labels using CSV files.
The CSV file needs to contain the following information:
Setting
Value
Location Name
Enter a new location name.
IP/CIDR
Enter the comma-separated IP address, CIDR block, or IP range for your location. Use IPv4 format and hyphen separate ranges. For example: 20.70.80.0/24, 10.70.80.20-10.70.80.50.
IP addresses cannot overlap. Each subset must be fully contained and fall within the defined IP range.
Port
Optional: Enter the comma-separated port or port range for your location. Port ranges should be hyphen separated. For example: 2598, 1500-1590.
Protocol
Select All, TCP, or UDP from the drop-down menu. TCP is the default value.
Exclude
Select Yes or No from the drop-down menu. No is the default value. When exclude is set to Yes, the IP address, CIDR block, or IP range is omitted from the dashboard metrics.
If you don't have a CSV file, use the following sample or Download a blank analytics label template from your cClear. Edit the values for your environment. Note the spacing necessary for the IP/CIDR formatting:
Location name,IP / CIDR,Port,Protocol,Exclude
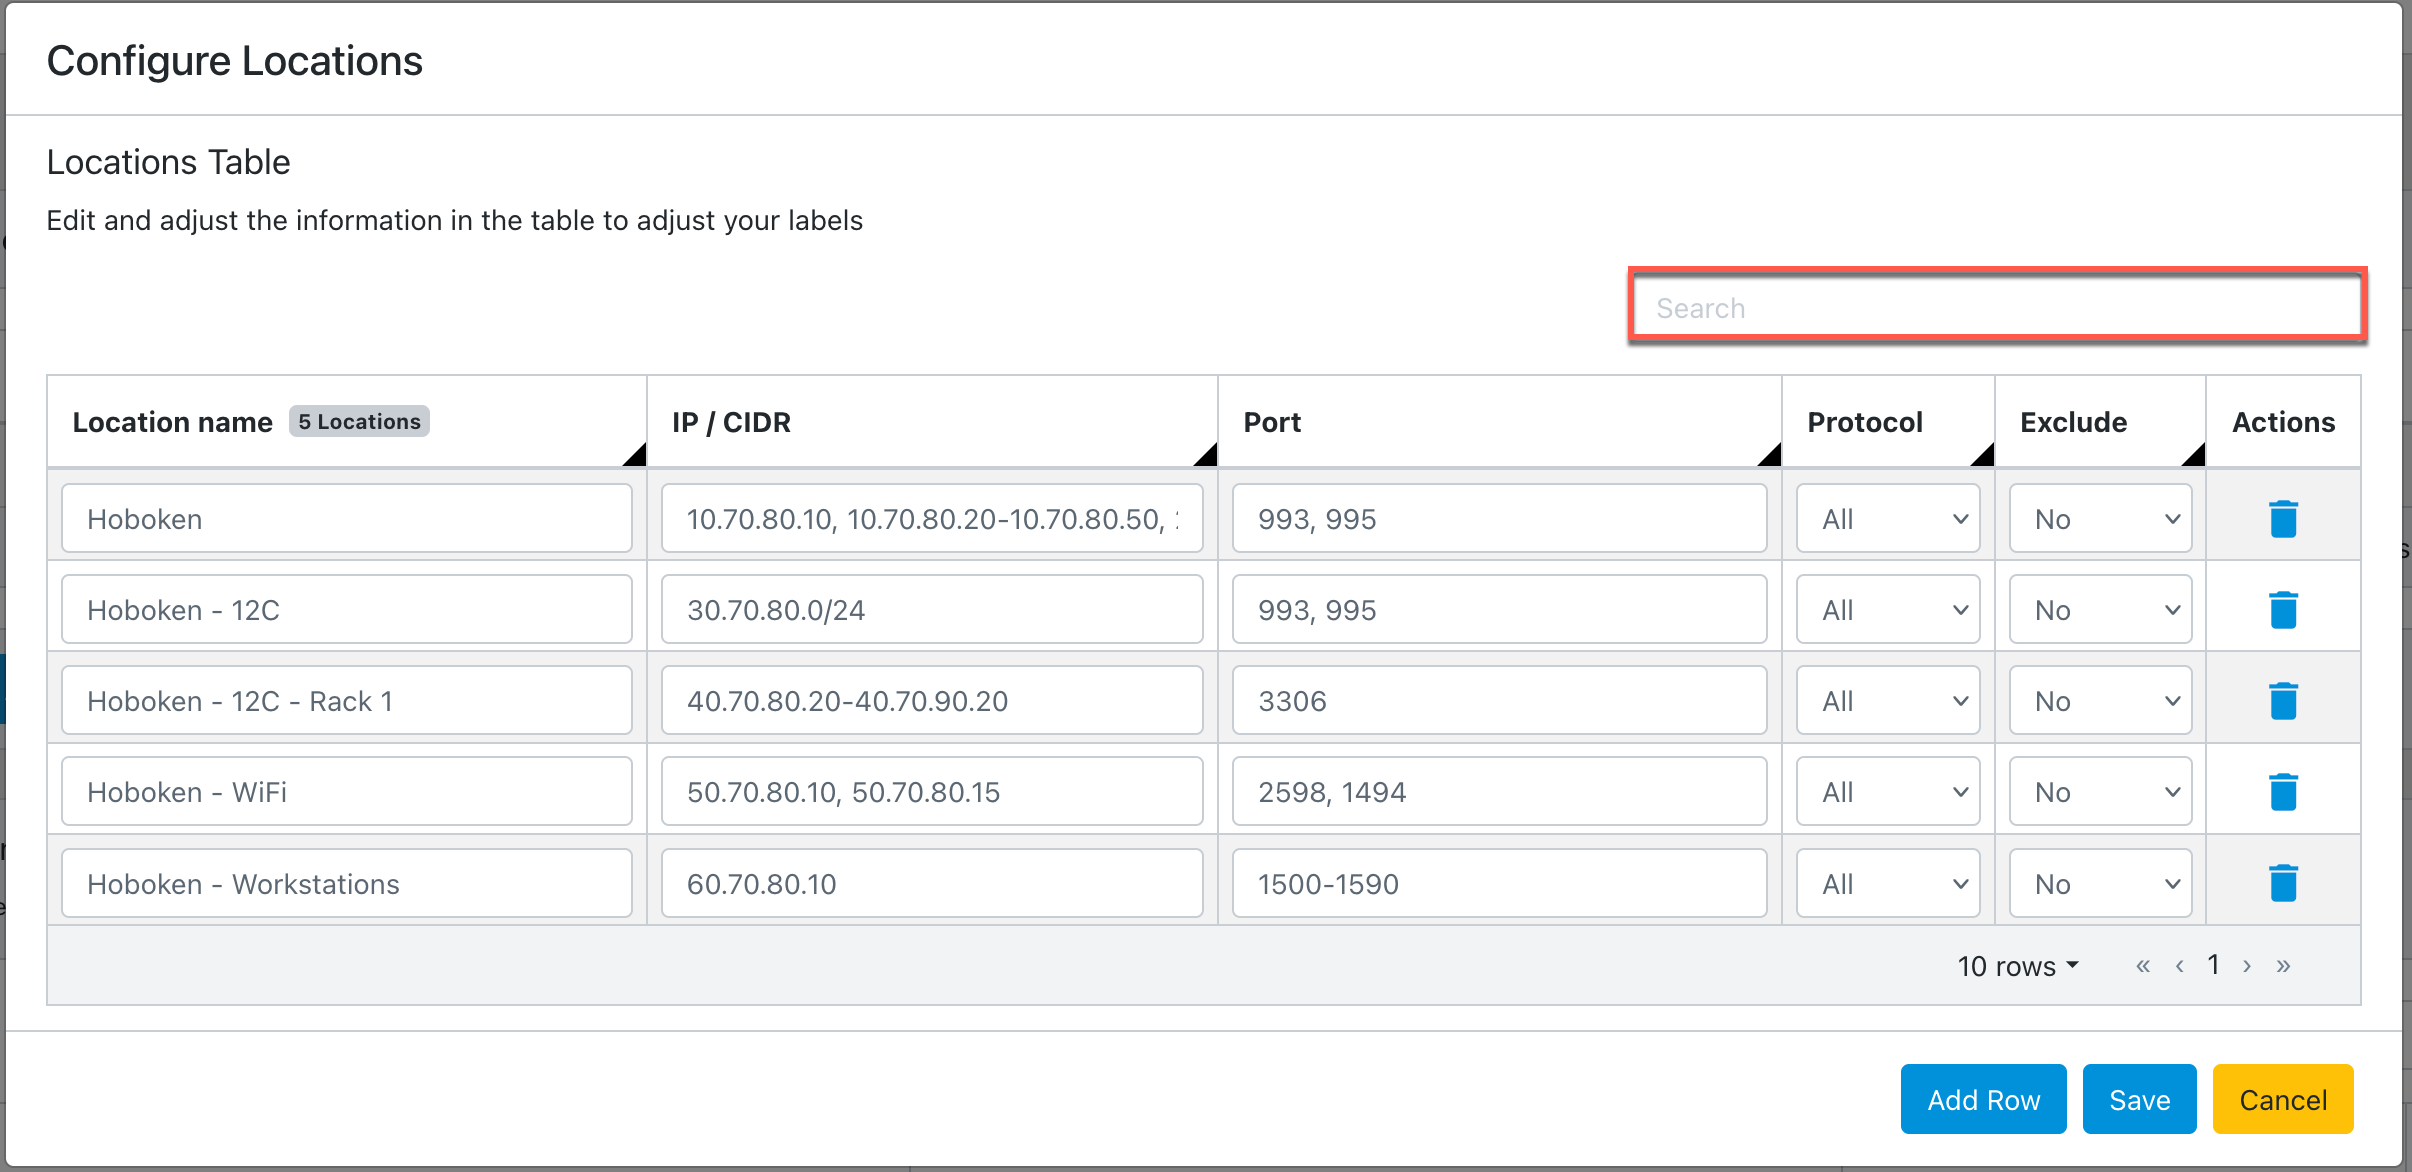
Hoboken,"10.70.80.10, 10.70.80.20-10.70.80.50, 20.70.80.0/24","993, 995",ALL,FALSE
Hoboken - 12C,30.70.80.0/24,"993, 995",ALL,FALSE
Hoboken - 12C - Rack 1,40.70.80.20-40.70.90.20,3306,ALL,FALSE
Hoboken - WiFi,"50.70.80.10, 50.70.80.15","1494, 2598",ALL,FALSE
Hoboken - Workstations,60.70.80.10,1500-1590,ALL,FALSE
Click Bulk Add Locations > Upload Your Completed CSV File to upload the CSV configuration file:
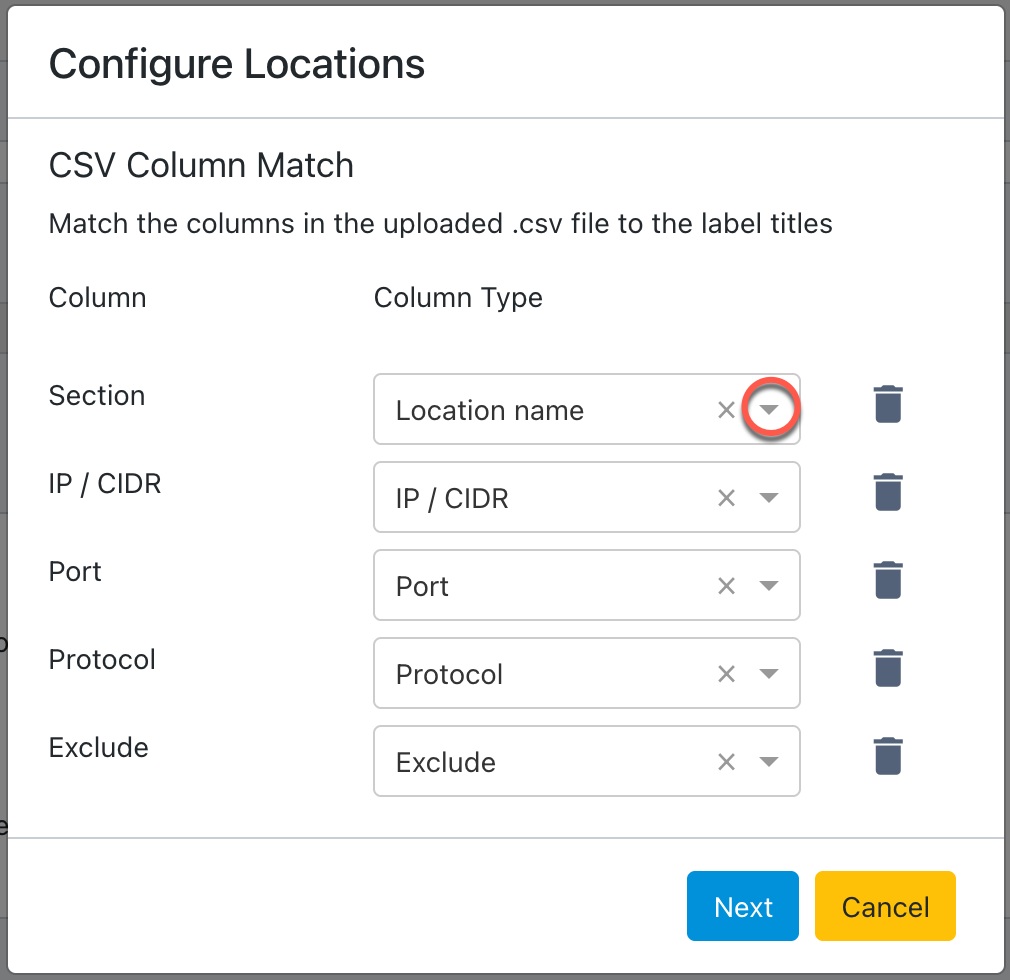
Use the drop-down in each Column Type field to match the label settings to the columns in the uploaded CSV file, and then click Next.
Edit any of the information in the table to adjust your labels. To add an additional label, click Add Row. To remove a label, click delete
in the Actions column.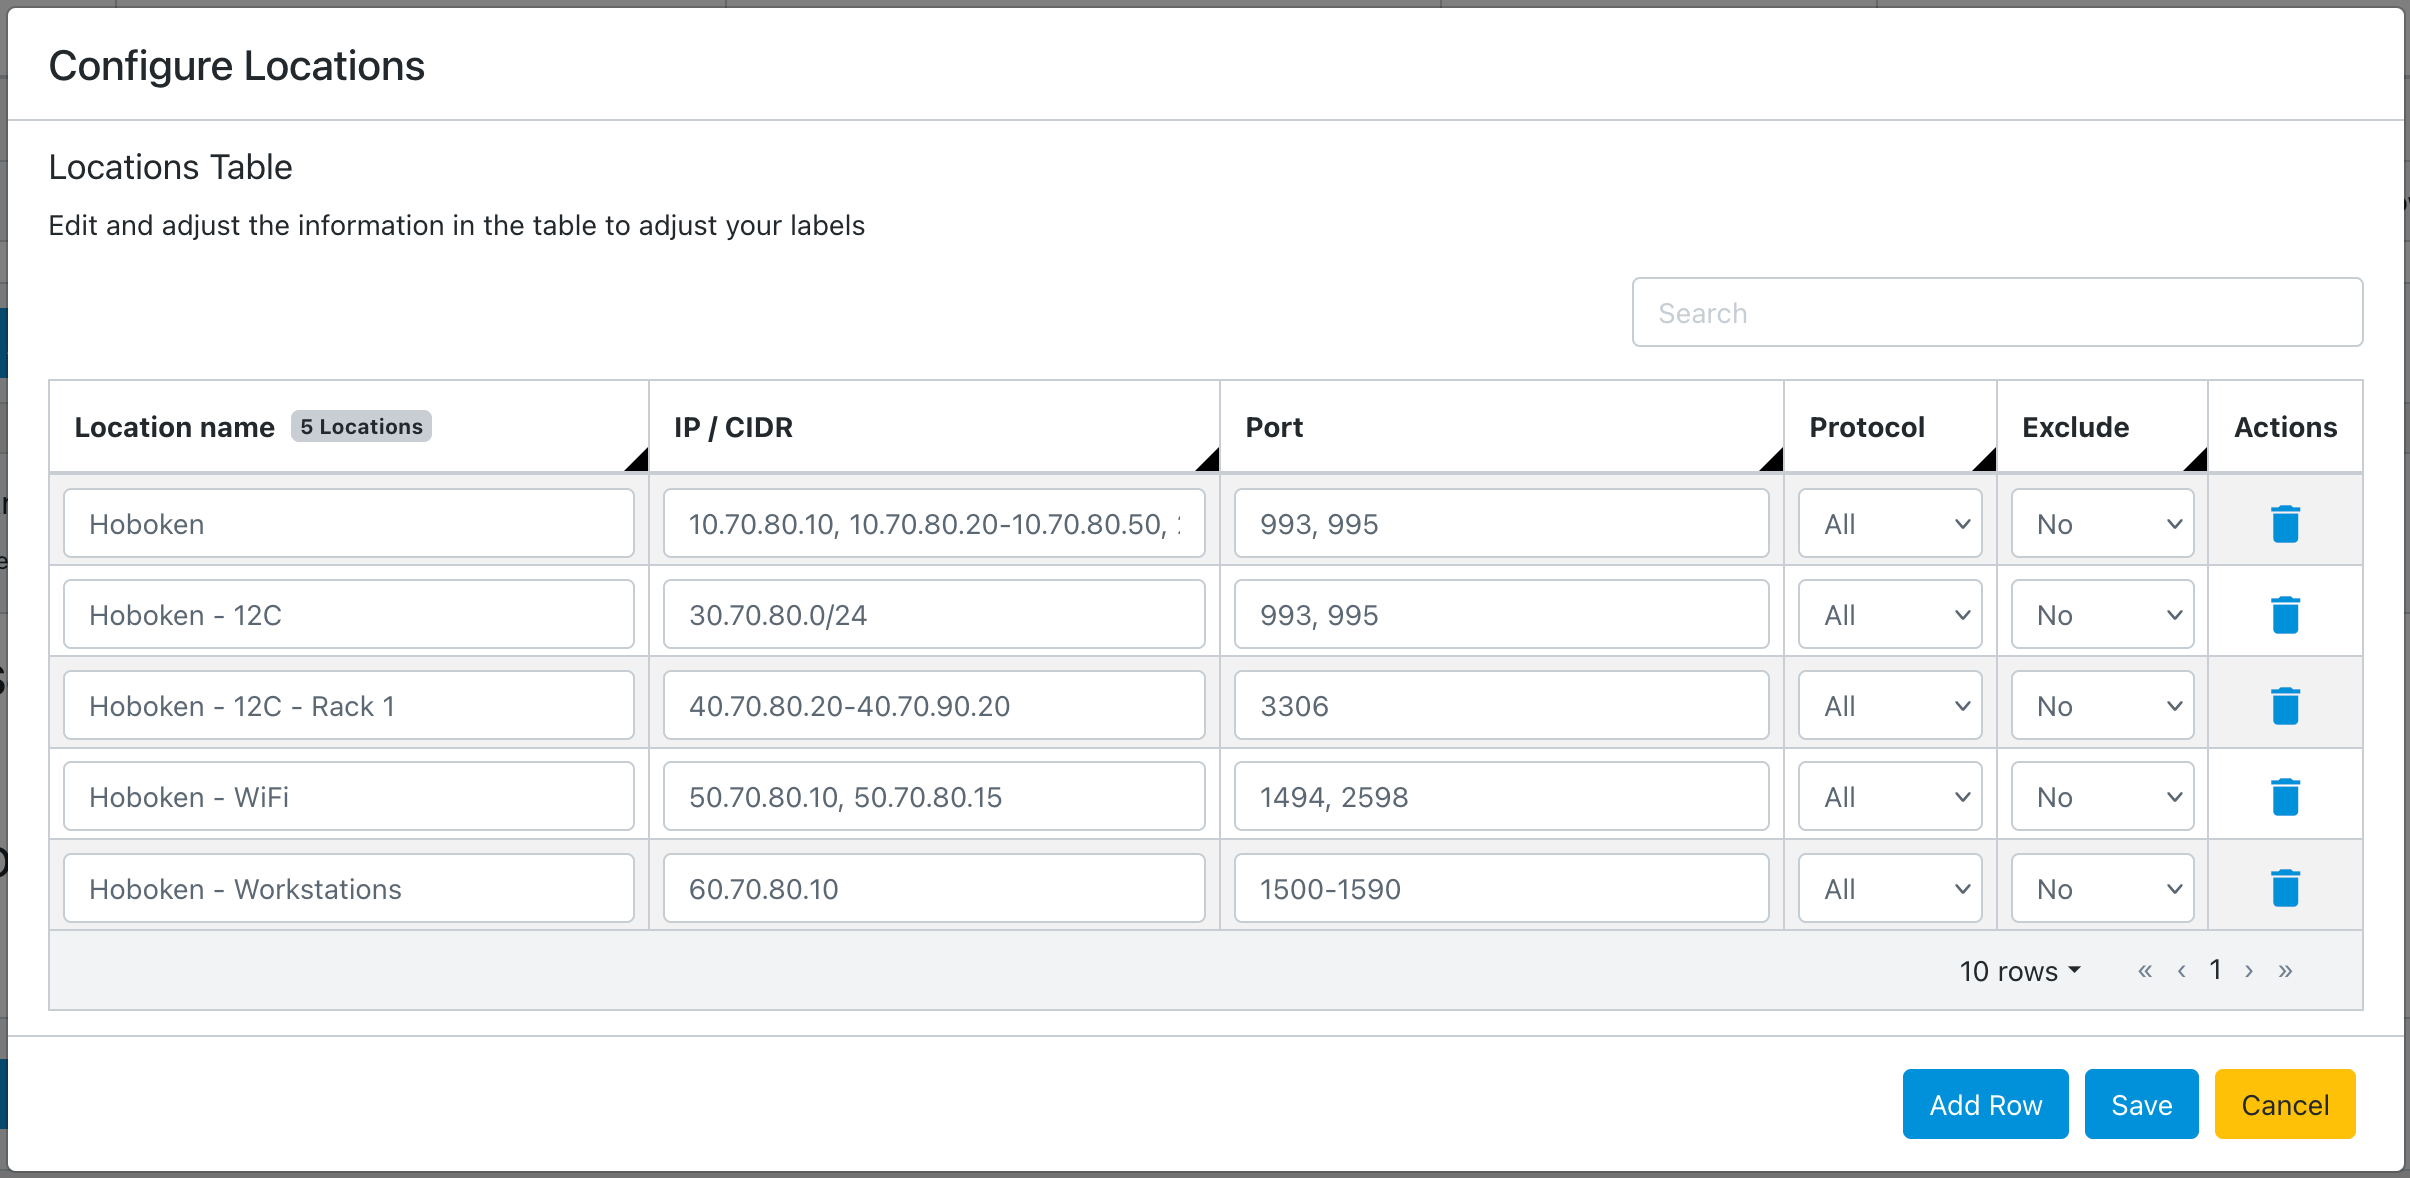
When you finish editing, click Save.
Configured locations are displayed:
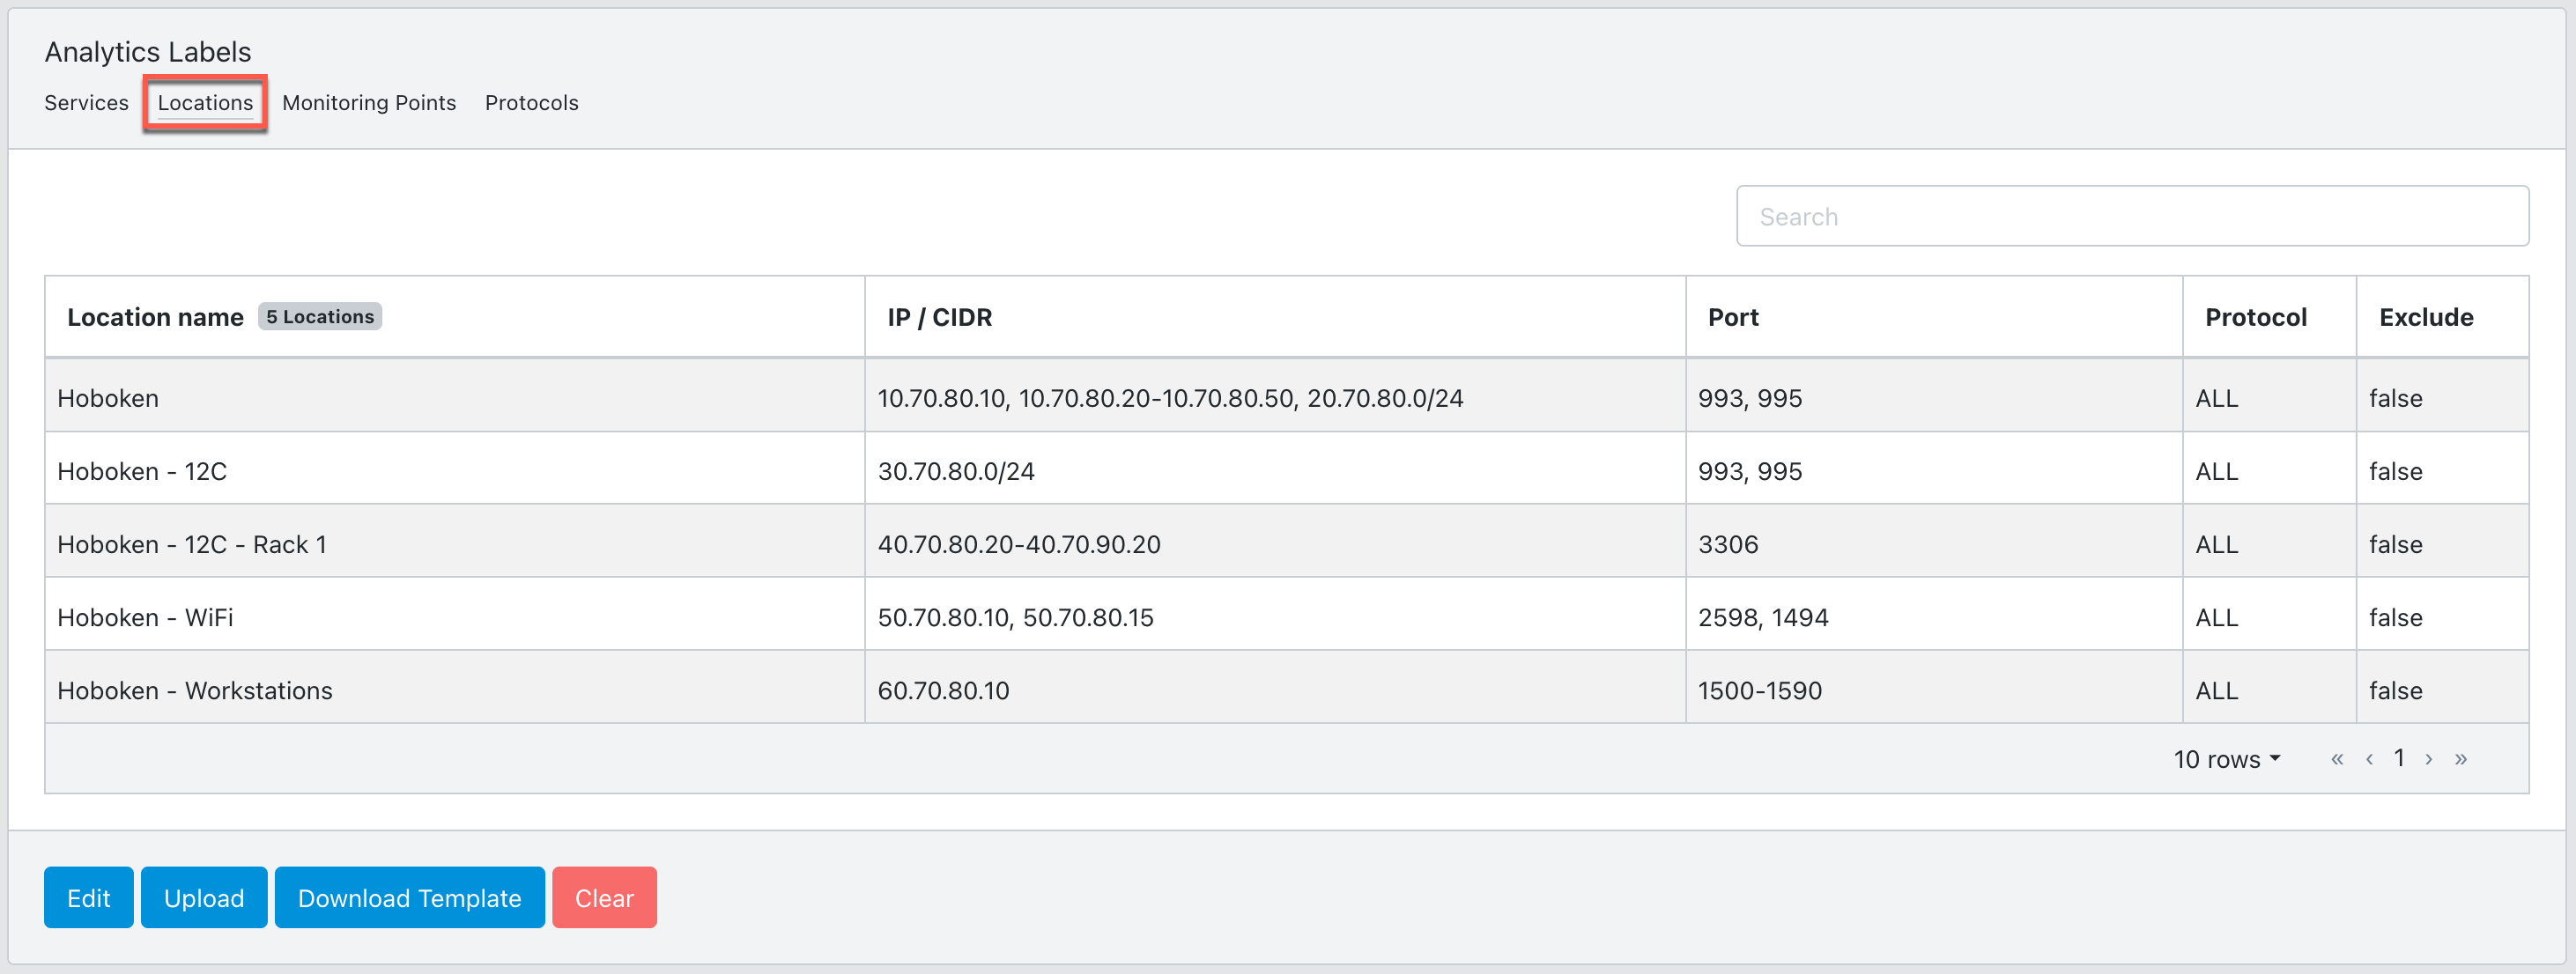
Alternatively, you can enter the label configuration manually using the cClear UI. Click Add Locations and enter the values from the table in Step 2. Click Save.
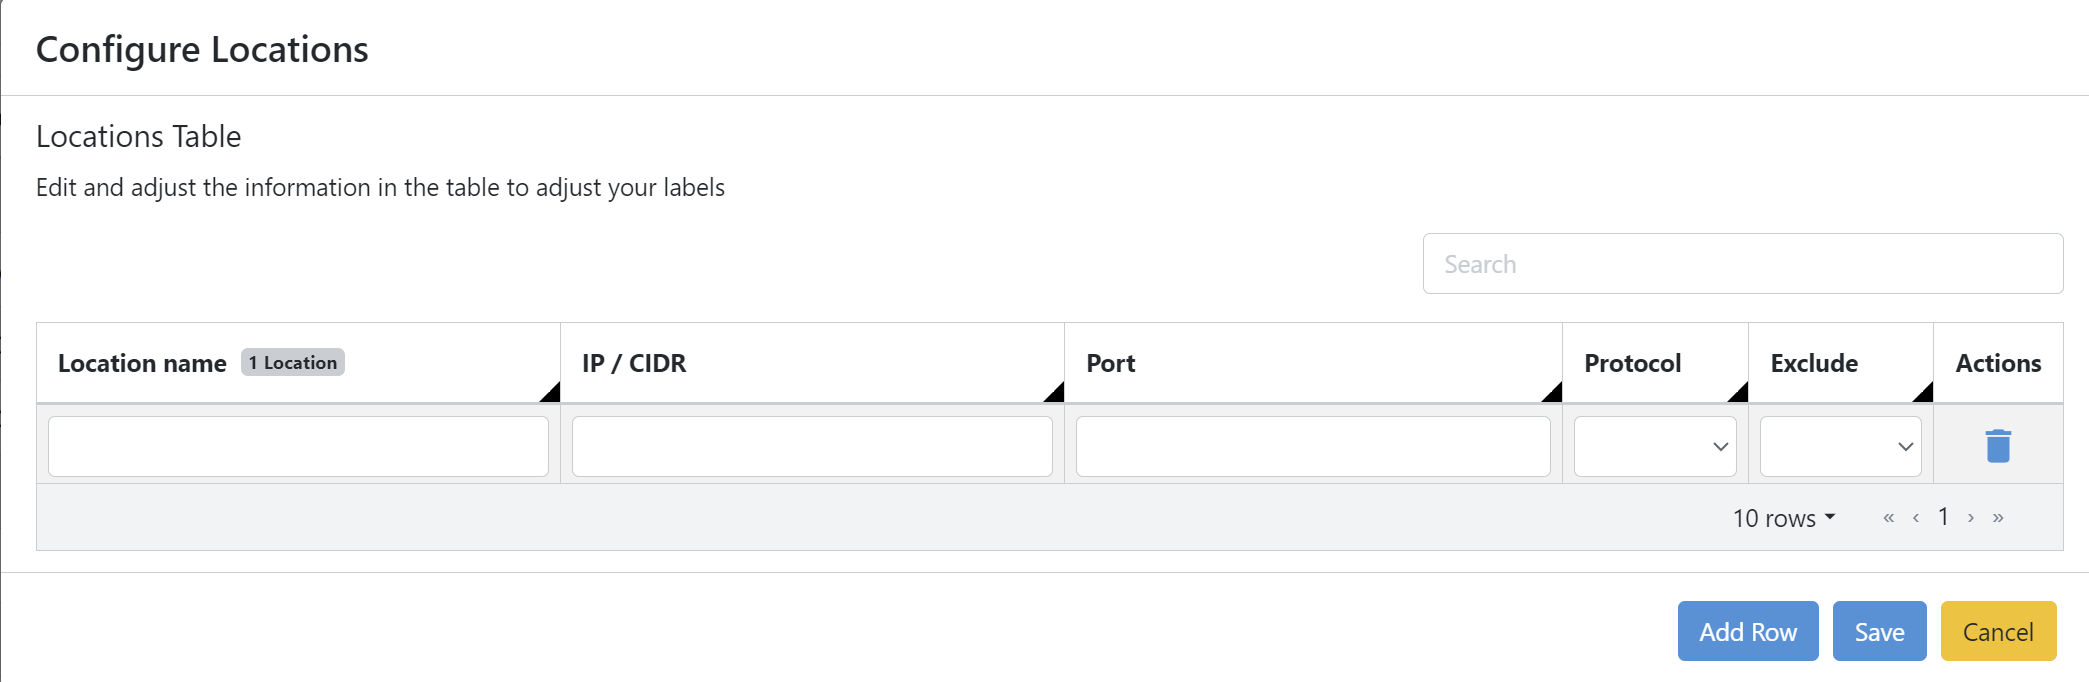
Click Edit to add, modify, or delete individual labels.
Use the search bar on the Locations Table to find the label you are looking for quickly.
Configure analytics labels using monitoring points
Use the following procedure to configure analytics labels using monitoring points. When traffic does not match a configured monitoring point, cClear displays a default monitoring point identifier in the format cstor_device_name|outer VLAN|inner VLAN. For example, CPSTH12R5U9|2001|0.
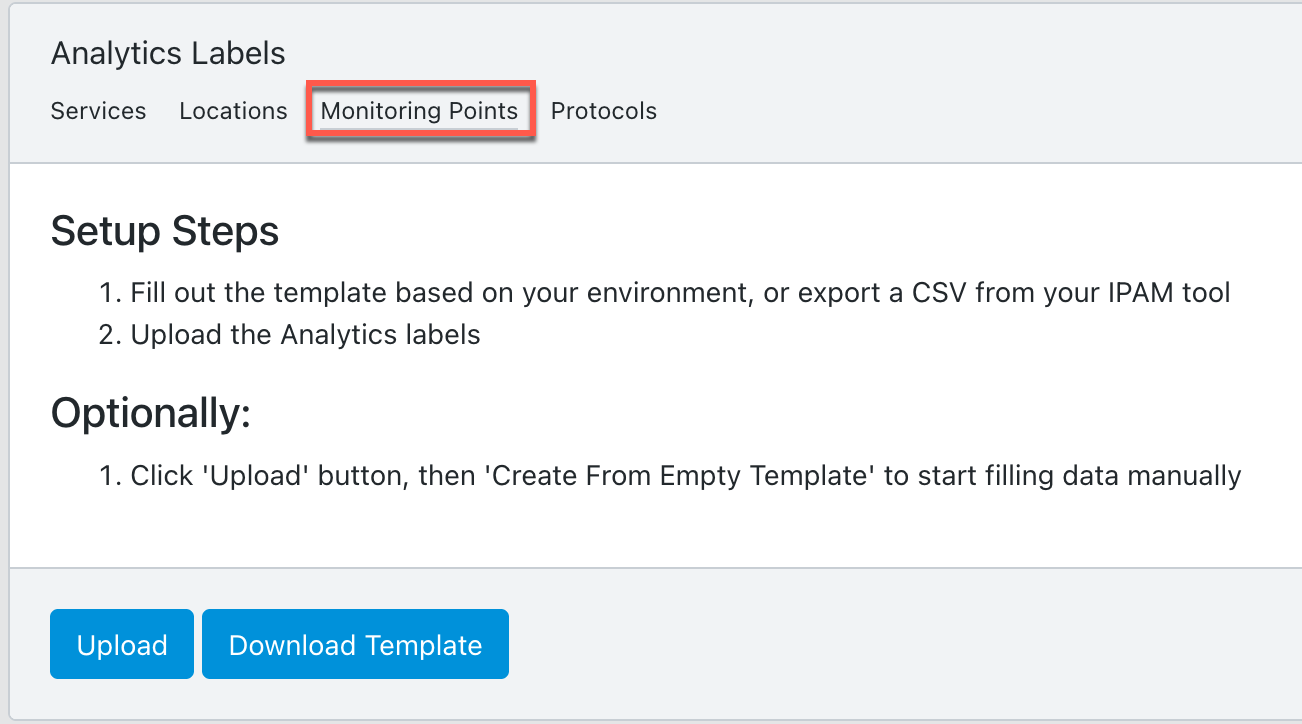
Go to Configure > Network Monitors > Analytics Labels and then select the Monitoring Points tab.
To add monitoring points in bulk, upload a CSV file exported from another cClear system or your IPAM tool. For more information, see Configure analytics labels using CSV files. Each record must contain a Monitoring Point Name and at least one value for: cStor, cStor Port, Outer VLAN, or Inner VLAN. cClear uses the populated fields to match traffic to the monitoring point.
The CSV file needs to contain the following information:
Setting
Value
Monitoring Point Name
Enter a new monitoring point name.
cStor
Enter the name of an existing cStor device on cClear. This field is optional. If left blank, cClear does not use cStor when matching traffic to the monitoring point.
cStor Port
Enter the cStor port to use when matching traffic to the monitoring point. Per-port mode must be enabled on the cStor. This field is optional. If left blank, cClear does not use cStor Port when matching traffic to the monitoring point.
Outer VLAN
Enter a valid VLAN ID between 0 and 4095. This field is optional. If left blank, cClear does not use Outer VLAN when matching traffic to the monitoring point. Blank values appear as 0 on dashboards.
Inner VLAN
Enter a valid VLAN ID between 0 and 4095. This field is optional. If left blank, cClear does not use Inner VLAN when matching traffic to the monitoring point. Blank values appear as 0 on dashboards.
If you don't have a CSV file, use the following sample or Download a blank analytics label template from your cClear. Edit the values for your environment.
Monitoring Point Name,cStor,cStor Port,Inner VLAN,Outer VLAN
Hoboken FW1 External,CPSTH12R5U9,1.1,2102,2302
Hoboken FW1 Internal,CPSTH12R5U9,2.1,,2304
Hoboken FW1 External,CPSTM18R6U4,,2104,2306
Hoboken FW1 Internal,CPSTM18R6U4,,,2308
AWS,CPSTVUSEV2,,,
Click Bulk Add Monitoring Points > Upload Your Completed CSV File to upload the CSV configuration file.
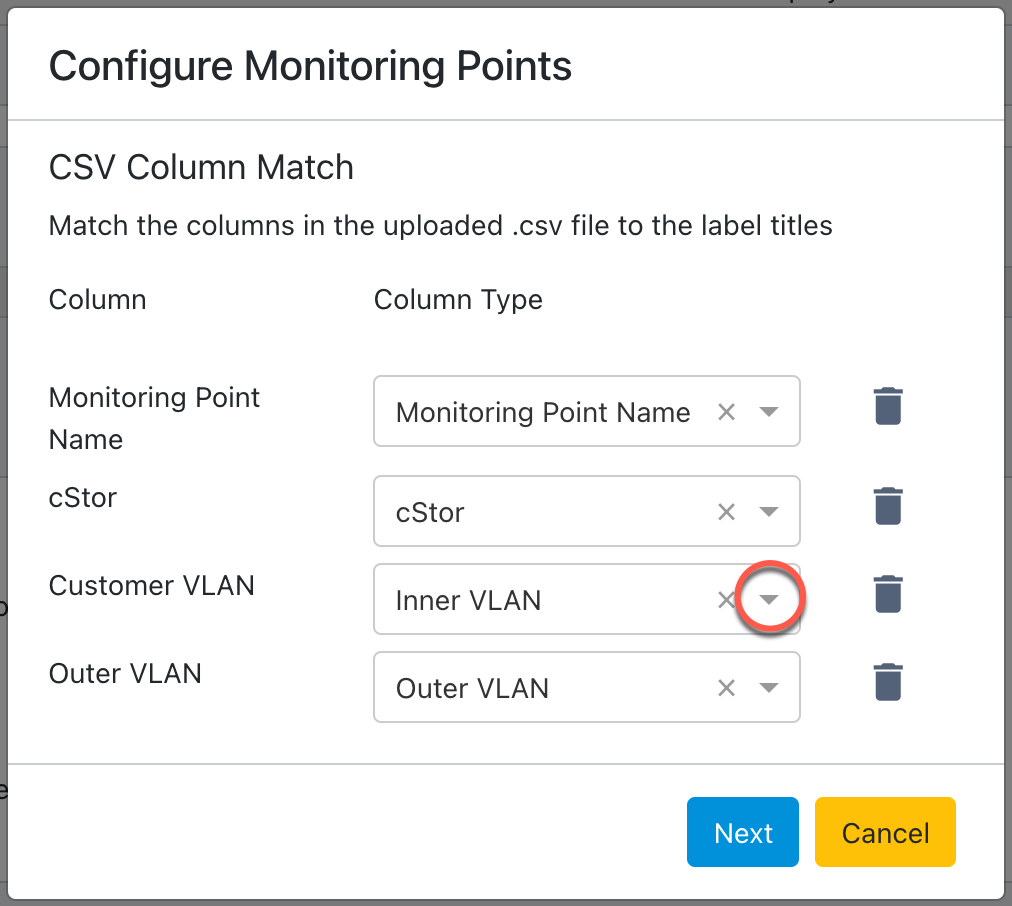
Use the drop-down in each Column Type field to match the label settings to the columns in the uploaded CSV file, and then click Next.
Edit any of the information in the table to adjust your monitoring points. To add an additional label, click Add Row. To remove a label, click delete
in the Actions column.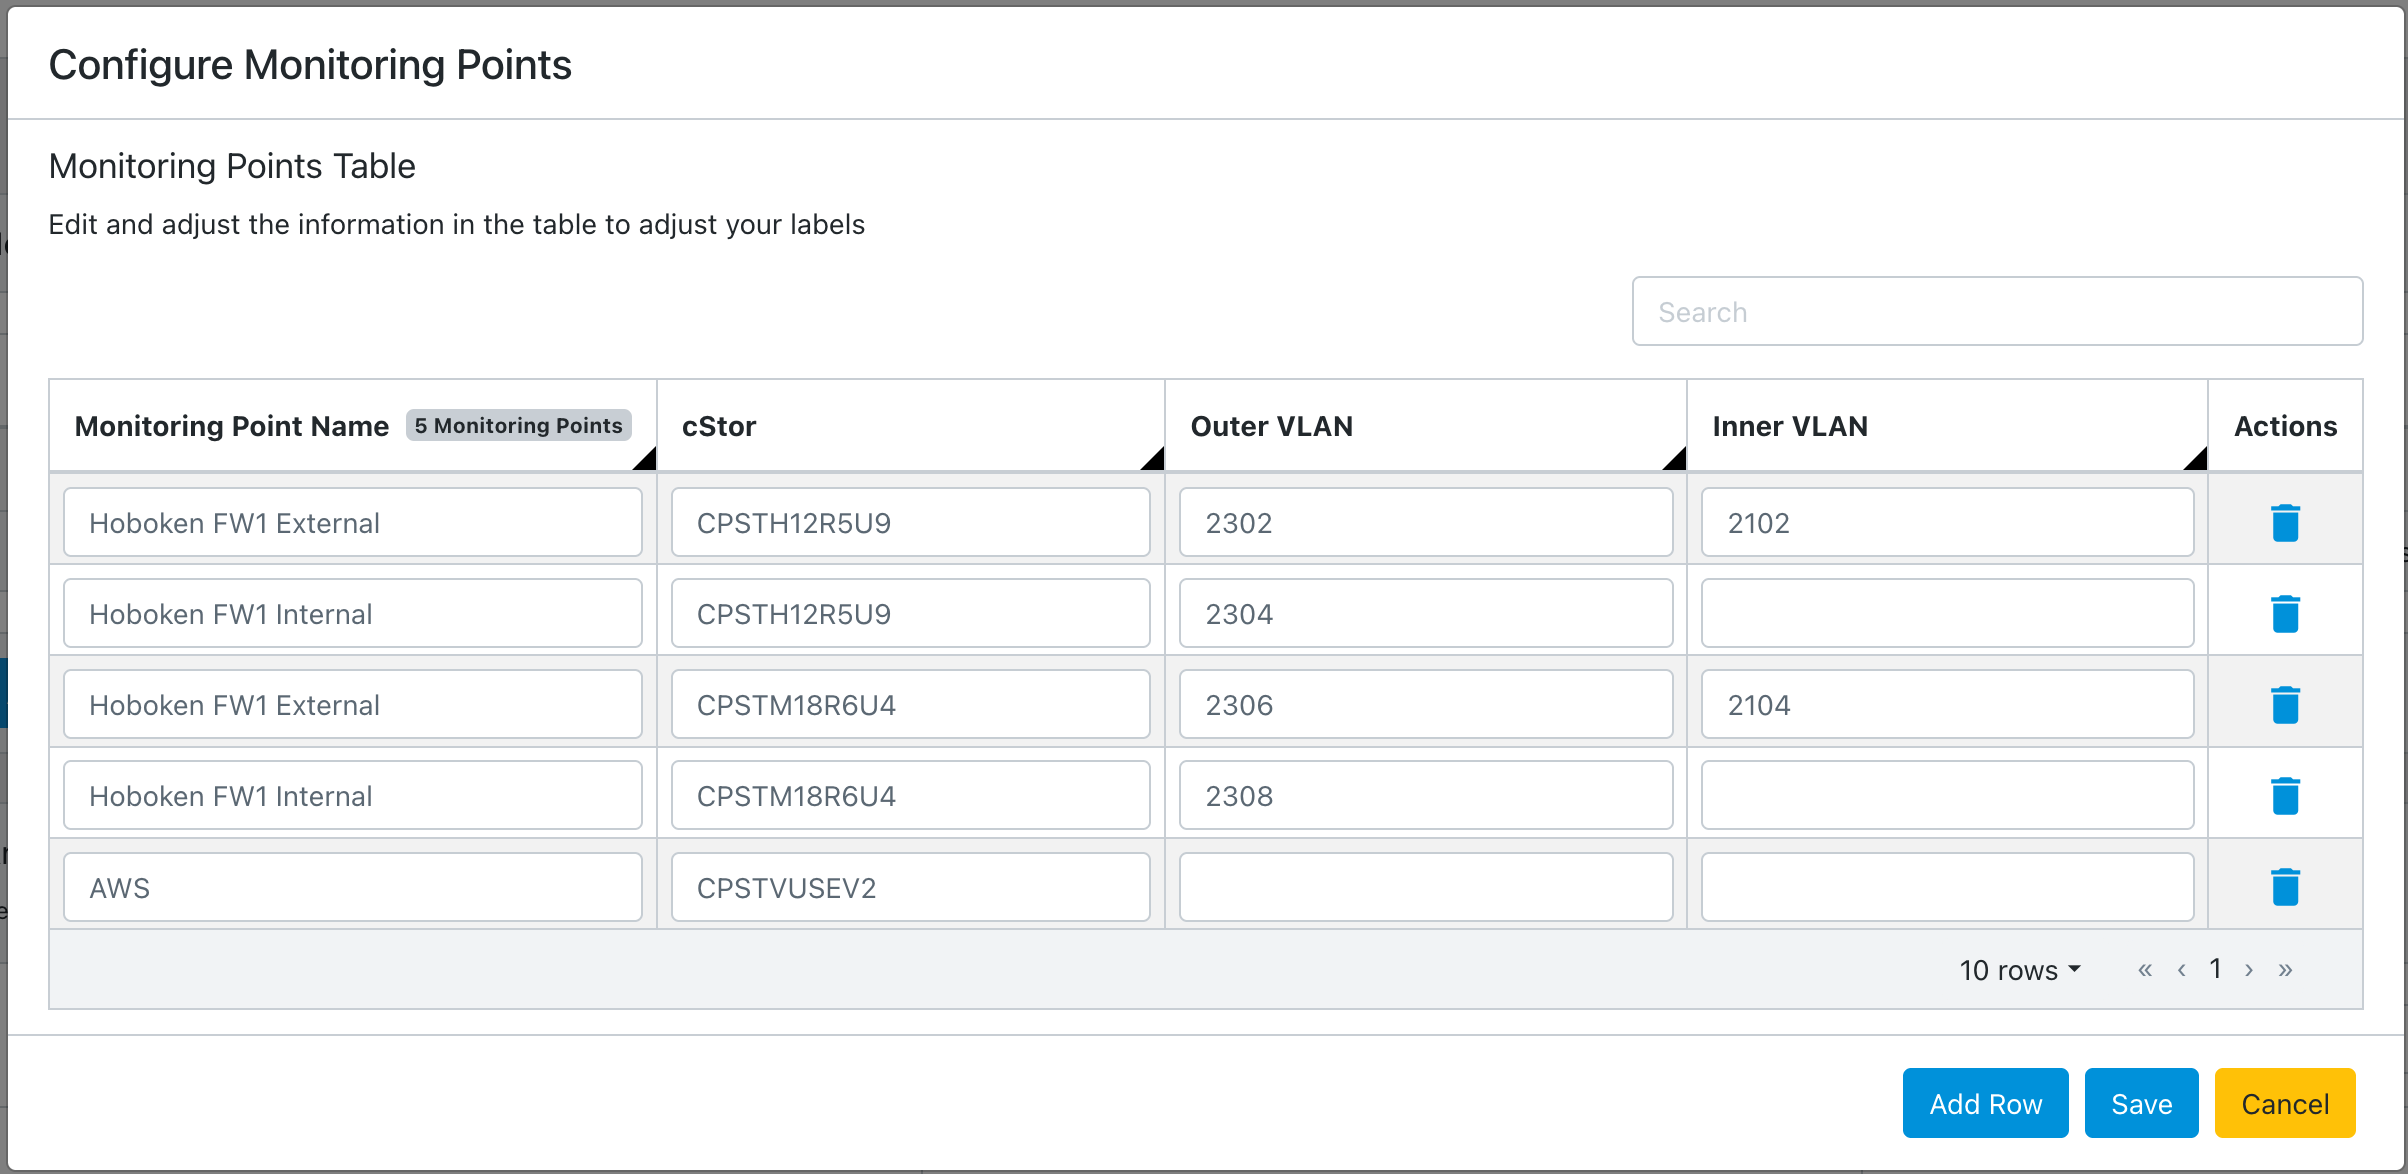
When you finish editing, click Save.
Configured monitoring points are displayed.
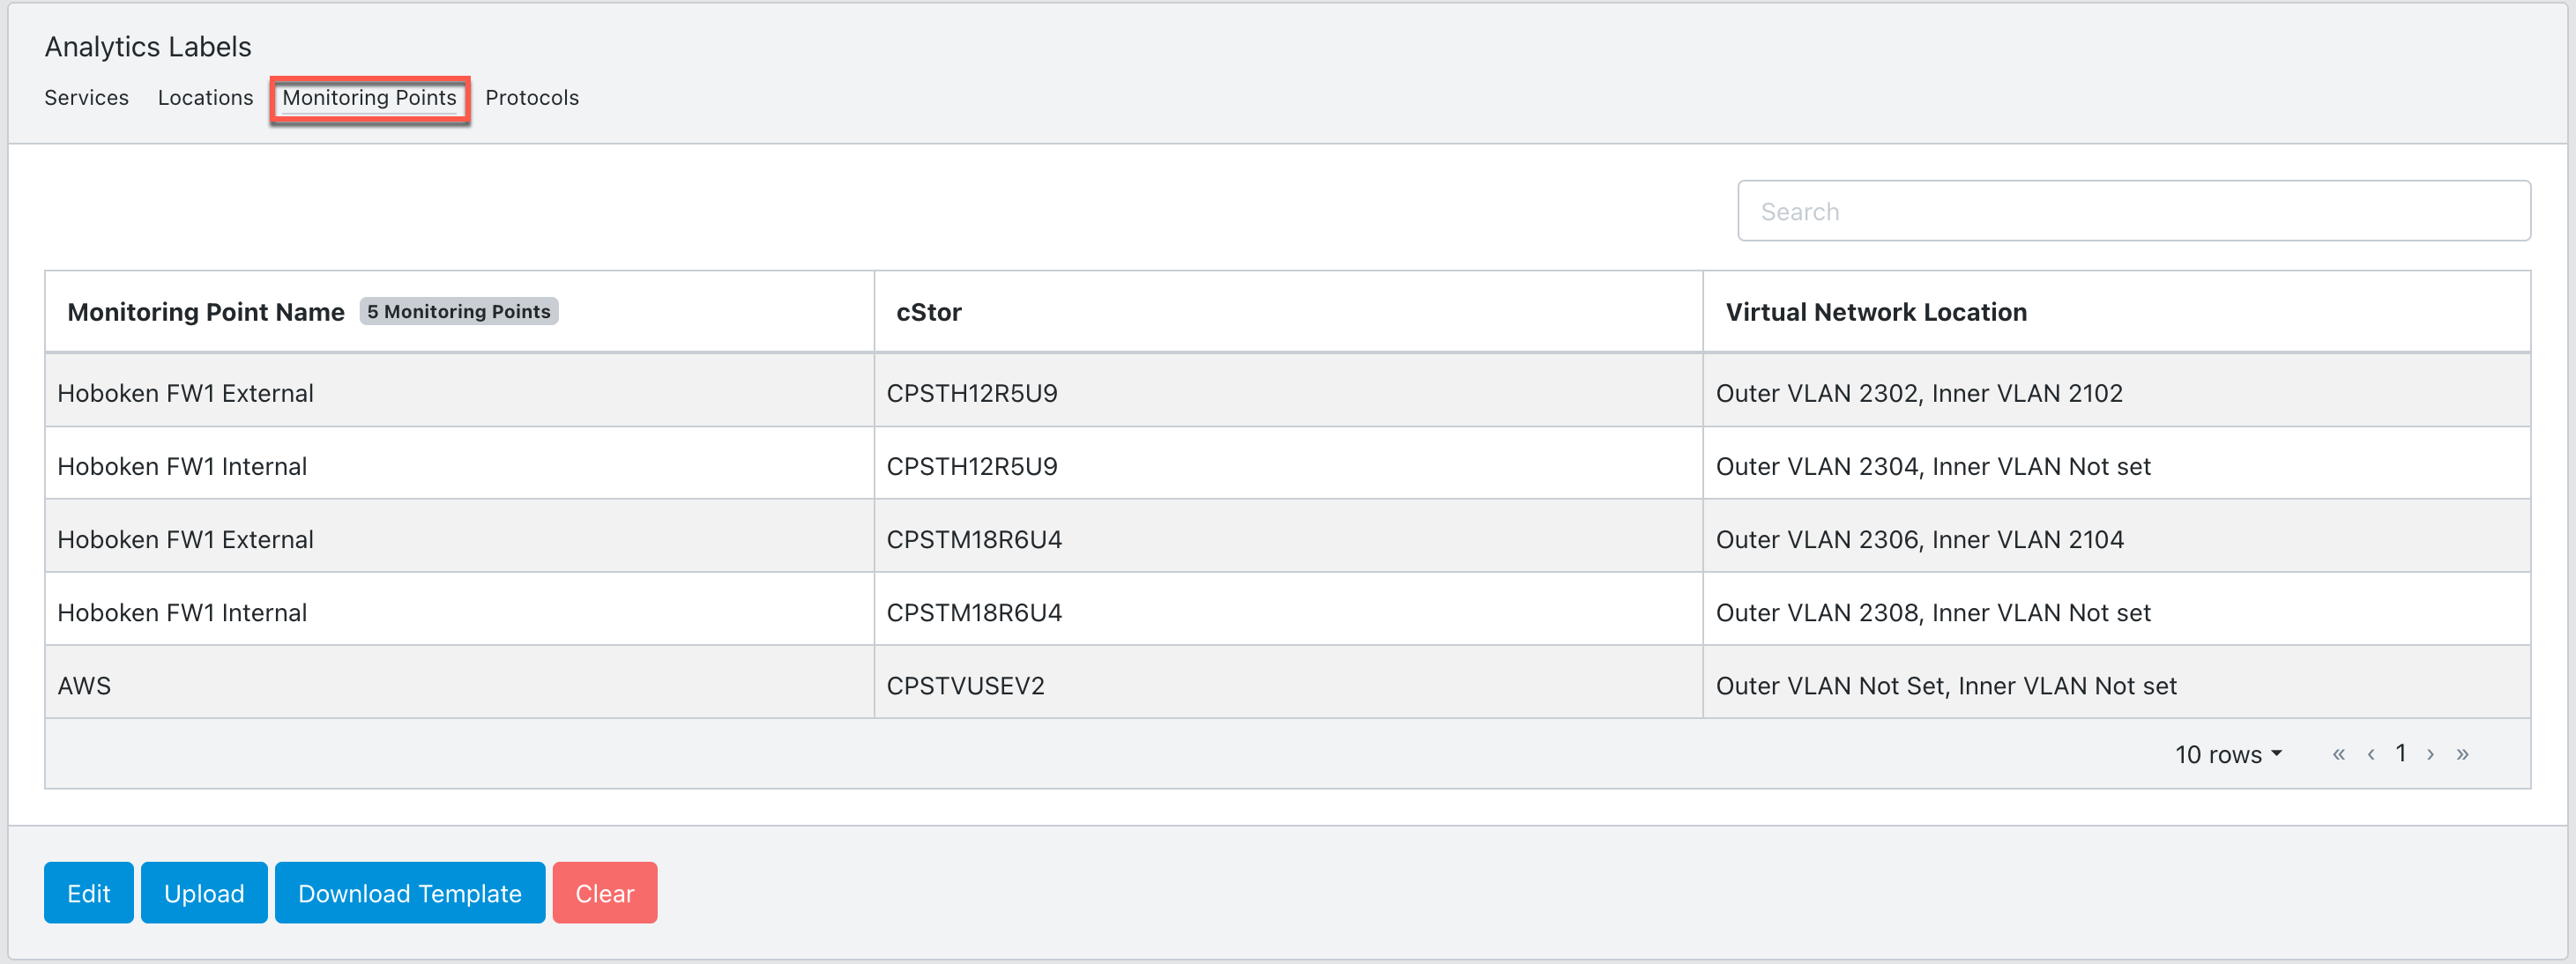
Alternatively, you can enter the label configuration manually using the cClear UI. Click Add Monitoring Points and enter the values from the table in Step 2. Click Save.
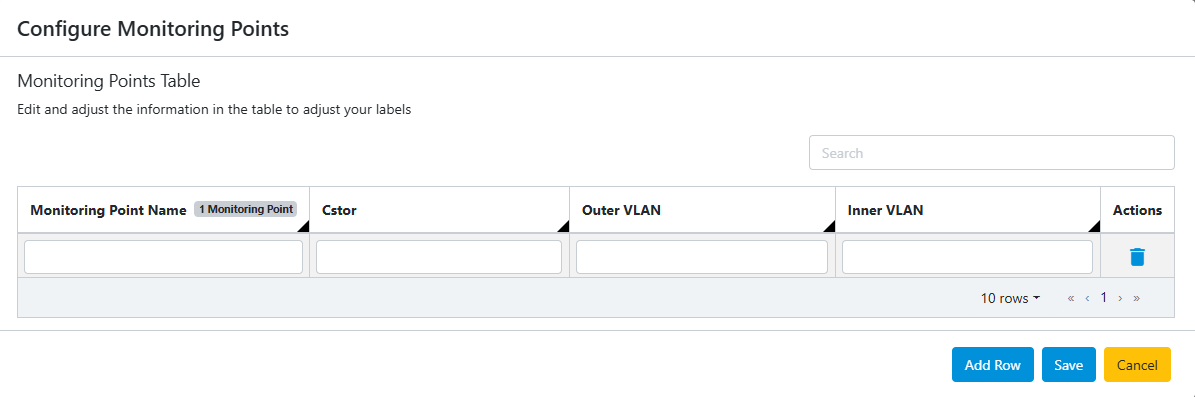
Click Edit to add, modify, or delete individual monitoring points.
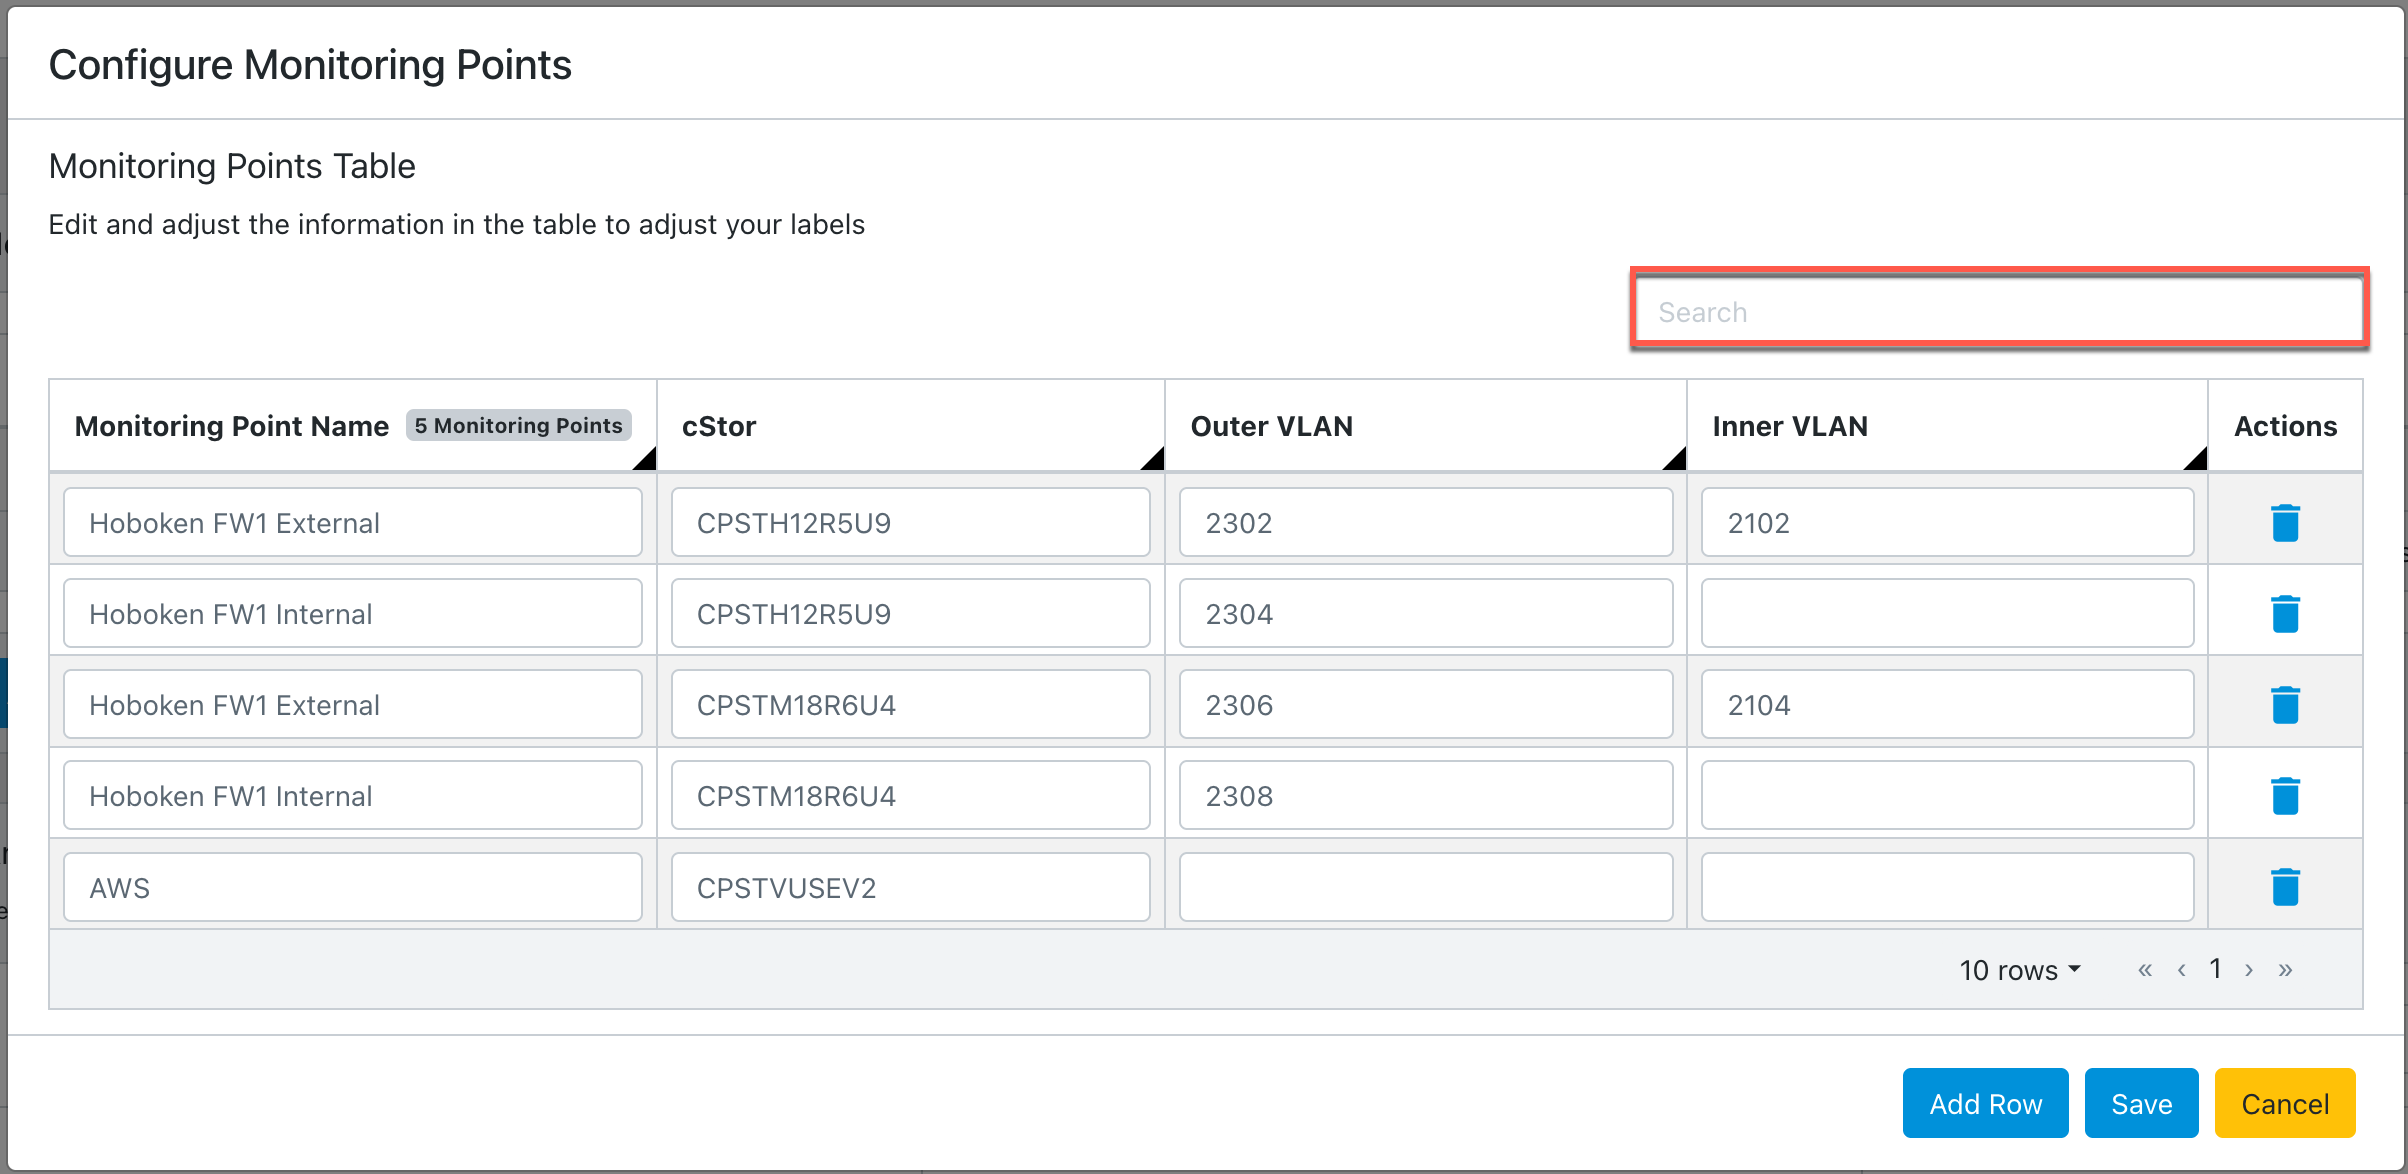
Use the search bar on the analytics labels panel to find the label you are looking for quickly.
Monitoring point matching precedence
Traffic can match more than one configured monitoring point definition. cClear evaluates definitions in the following order based on the populated fields and uses the first match:
cStor, cStor Port, Outer VLAN, Inner VLAN
cStor, cStor Port, Outer VLAN
cStor, cStor Port, Inner VLAN
cStor, cStor Port
cStor, Outer VLAN, Inner VLAN
cStor, Outer VLAN
cStor, Inner VLAN
cStor
cStor Port, Outer VLAN, Inner VLAN
cStor Port, Outer VLAN
cStor Port, Inner VLAN
cStor Port
Outer VLAN, Inner VLAN
Outer VLAN
Inner VLAN
If traffic does not match any configured monitoring point definition, cClear uses the default monitoring point identifier.
Configure analytics labels using protocols
Use the following procedure to configure analytics labels using custom protocols. Defining custom protocols is optional. Standard TCP and UDP known ports used by protocols are added by default. See Default TCP protocols and Default UDP protocols for default port numbers and their associated protocols.
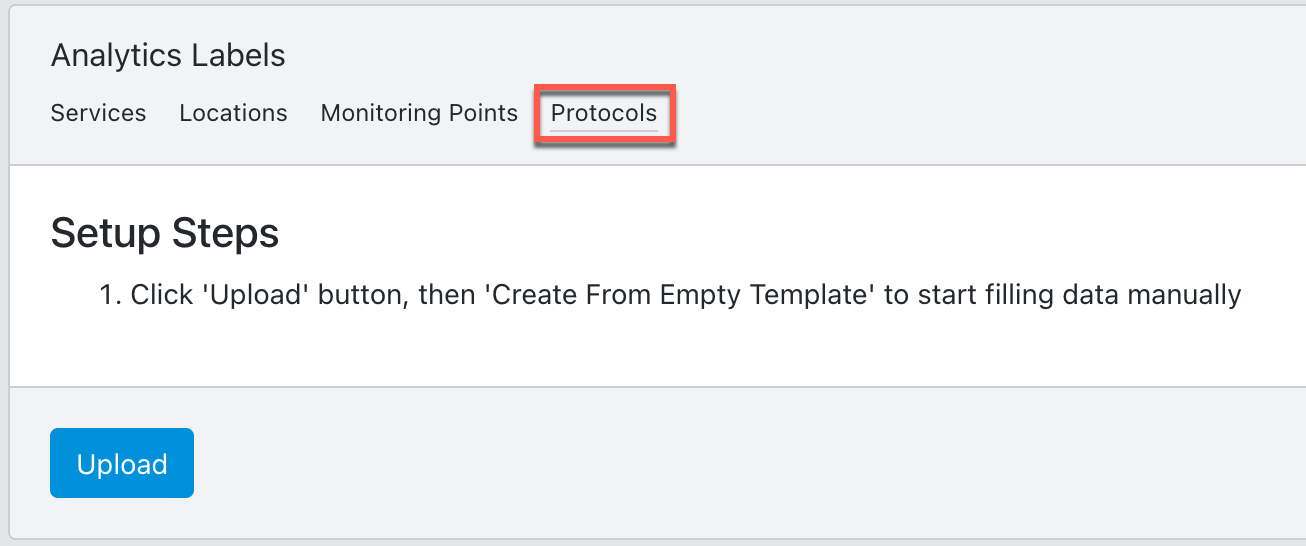
Go to Configure > Network Monitors > Analytics Labels and select the Protocols tab.
Click Add Protocols.
Enter or select the following information in the table:
Setting
Value
Custom protocol
Enter a new custom protocol name.
Transport
Select All, TCP, or UDP from the drop-down menu. TCP is the default value.
Port
Enter the port number.
To add an additional label, click Add Row. To remove a label, click delete
 in the Actions column.
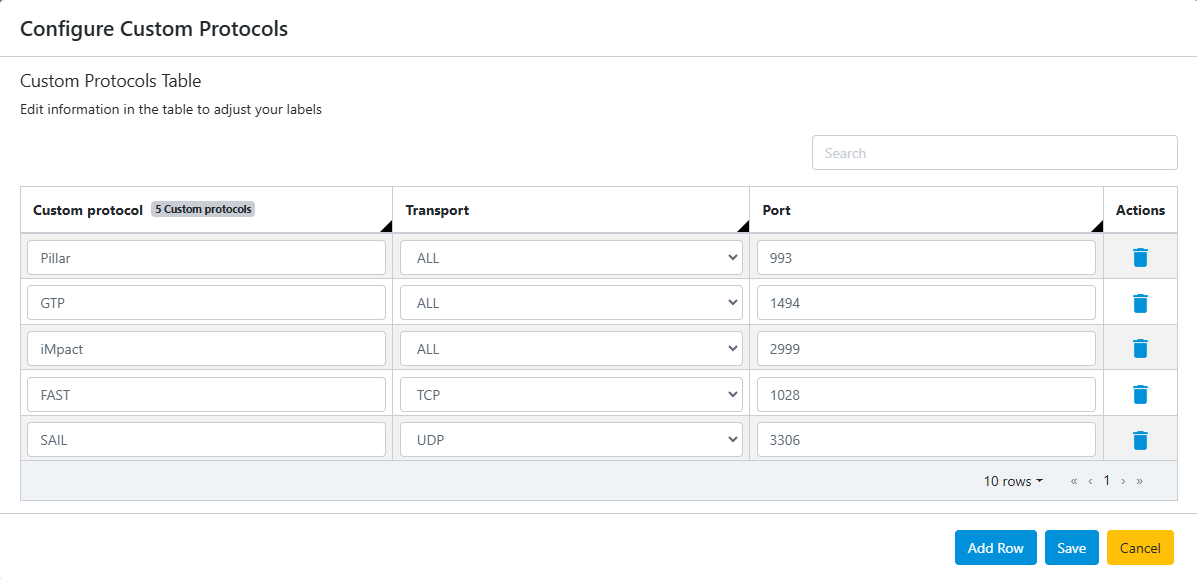
Click Save.
Configured custom protocols are displayed:
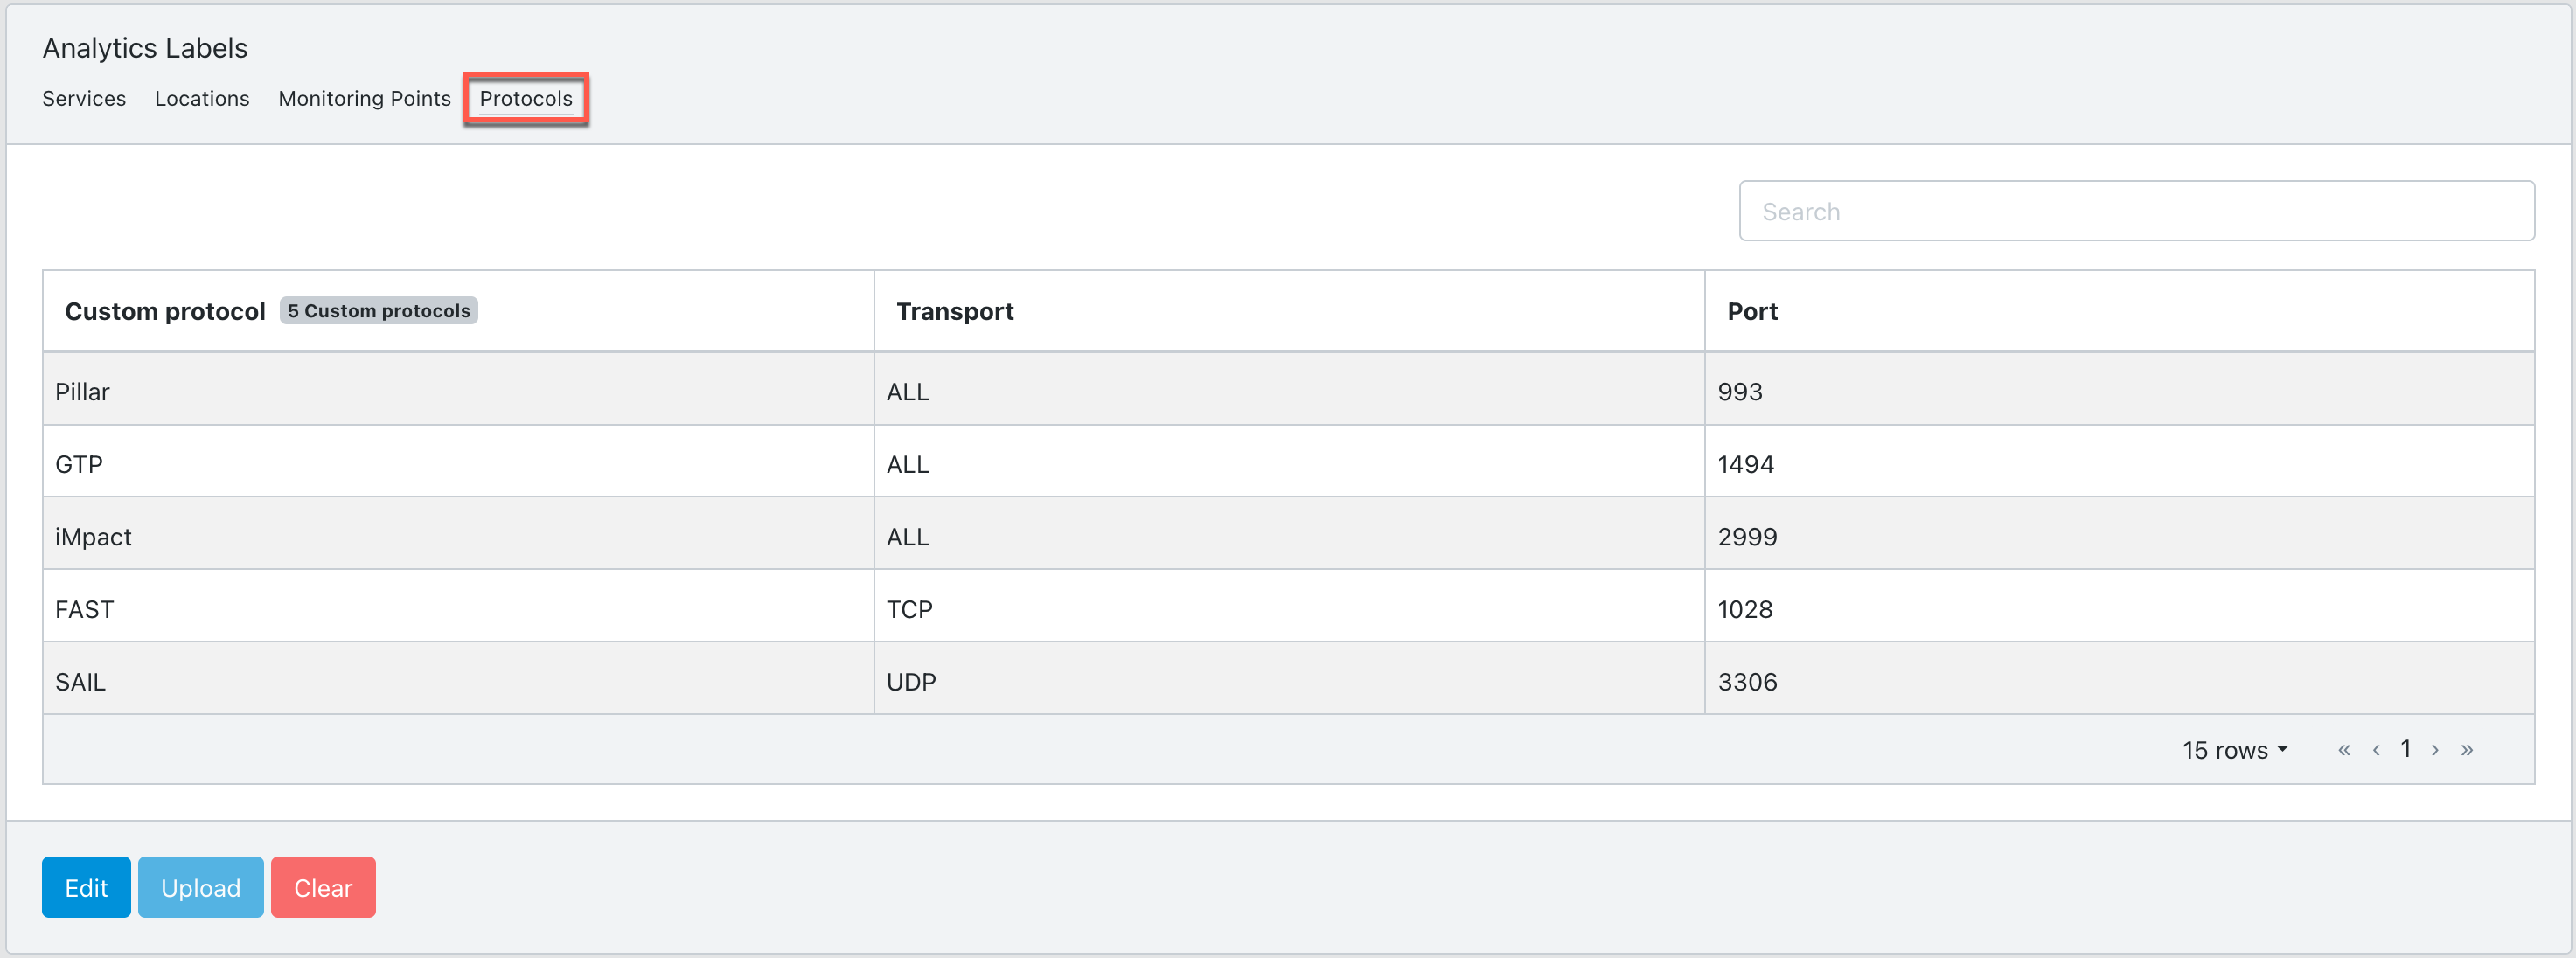
Click Edit to add, modify, or delete individual labels.
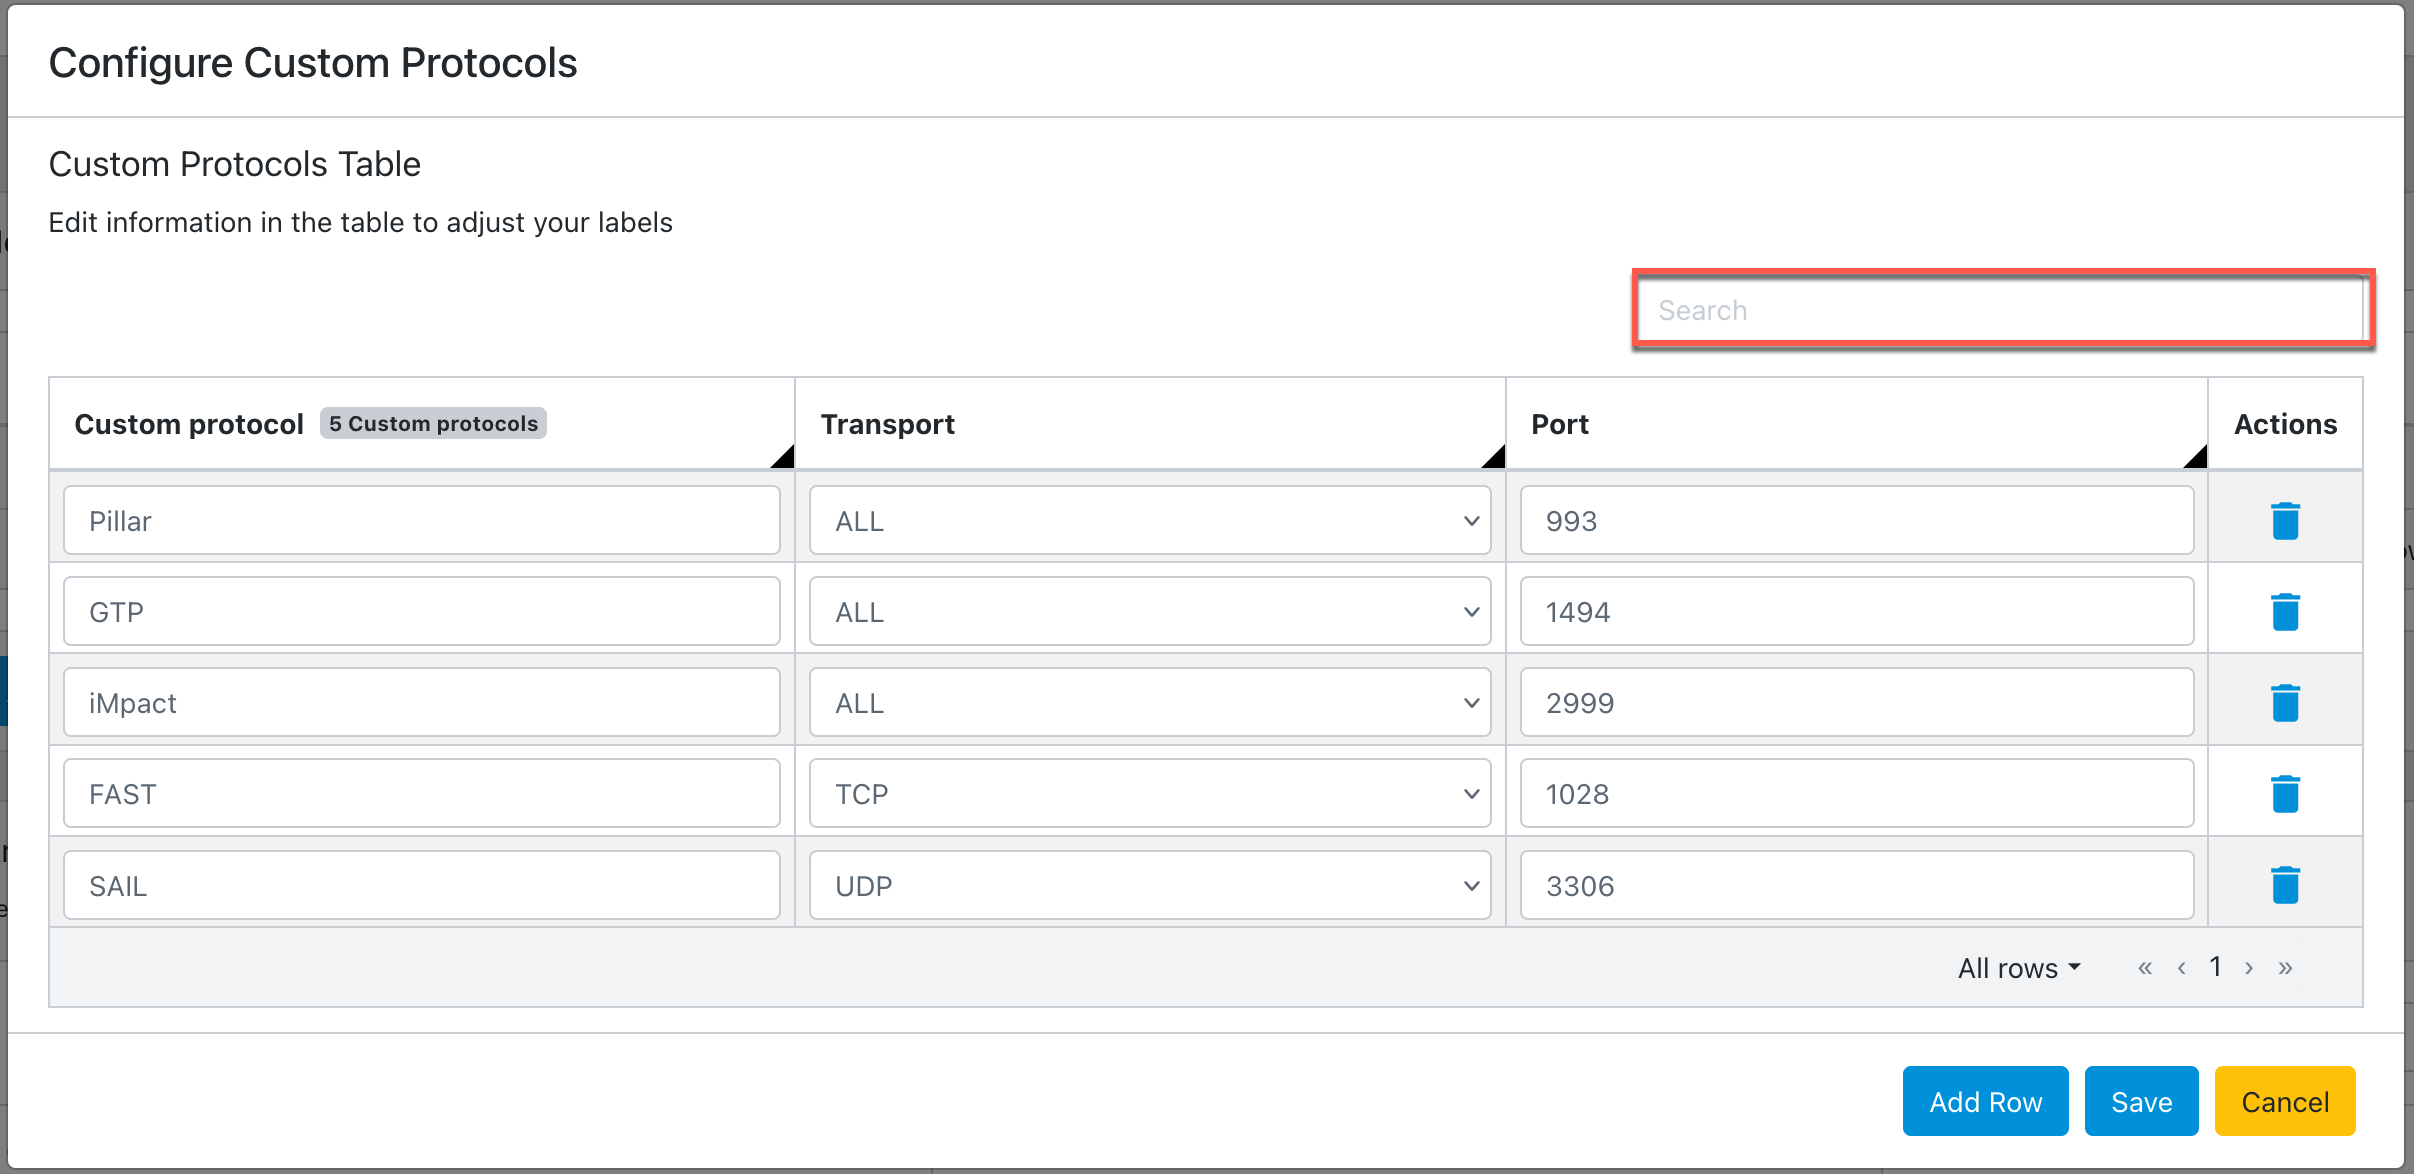
Use the search bar on the analytics labels panel to find the label you are looking for quickly.
Configure analytics labels using CSV files
Download a blank analytics label template
Use a blank CSV template to create new analytics labels.
Go to Configure > Network Monitors > Analytics Labels.
Select the Services, Locations, or Monitoring Points tab.
Click Bulk Add for the selected analytics label type.
Click our CSV template file to download a CSV template.
The downloaded template includes example values. Replace the sample entries with values from your environment.
Download the current analytics label configuration
Use this option to export existing analytics labels as a CSV file.
Go to Configure > Network Monitors > Analytics Labels.
Select the Services, Locations, or Monitoring Points tab.
Click Download CSV for the selected analytics label type.
The downloaded file contains the current label settings. You can upload this file to another cClear device to replicate the same configuration.
Note
Protocol analytics labels do not support CSV-based configuration. You cannot download a template, export the current configuration, or upload a CSV file.
Clear the analytics label configuration
To delete an analytics label configuration:
Go to Configure > Network Monitors > Analytics Labels.
Select the Services, Locations, Monitoring Points, or Protocols tab.
Click Clear.